It never ceases to amaze me how misinformation defies the laws of physics and seems to travel faster than the speed of light. This especially seems to be true when the message contained something scary. And there is nothing more scary it seems than losing one’s privacy. The most recent scare tactic comes in a message that you’ve probably seen it looks like this.

Recent Facebook Privacy Warning
My usual source for debunking myths is Snopes.com. However this post from them which they described as “mixed” true and false was so confusing to even me that I wasn’t sure what the real deal was. That inspired me to conduct some experiments of my own.
I created a fake profile on Facebook with the name “Boliver Shagnasty”. That was the name of a character that the late great comedian Red Skelton used to play. Legend has it that my father wanted to name me this when I was born. It was a brand-new account with whatever the default privacy settings were going to be. I posted two posts on his own wall. I sent a friend request to my dad’s Facebook account and then logged in under my dad’s account and accepted the friend request. I then had my dad “like” one of the posts and “comment” on the second post. Here is a screen capture of the Boliver Shagnasty Facebook page logged in as himself. You can see that he is logged in under his own account because his name is in the upper right corner. You can click on this image to see it full size. I know it’s unreadable as is.
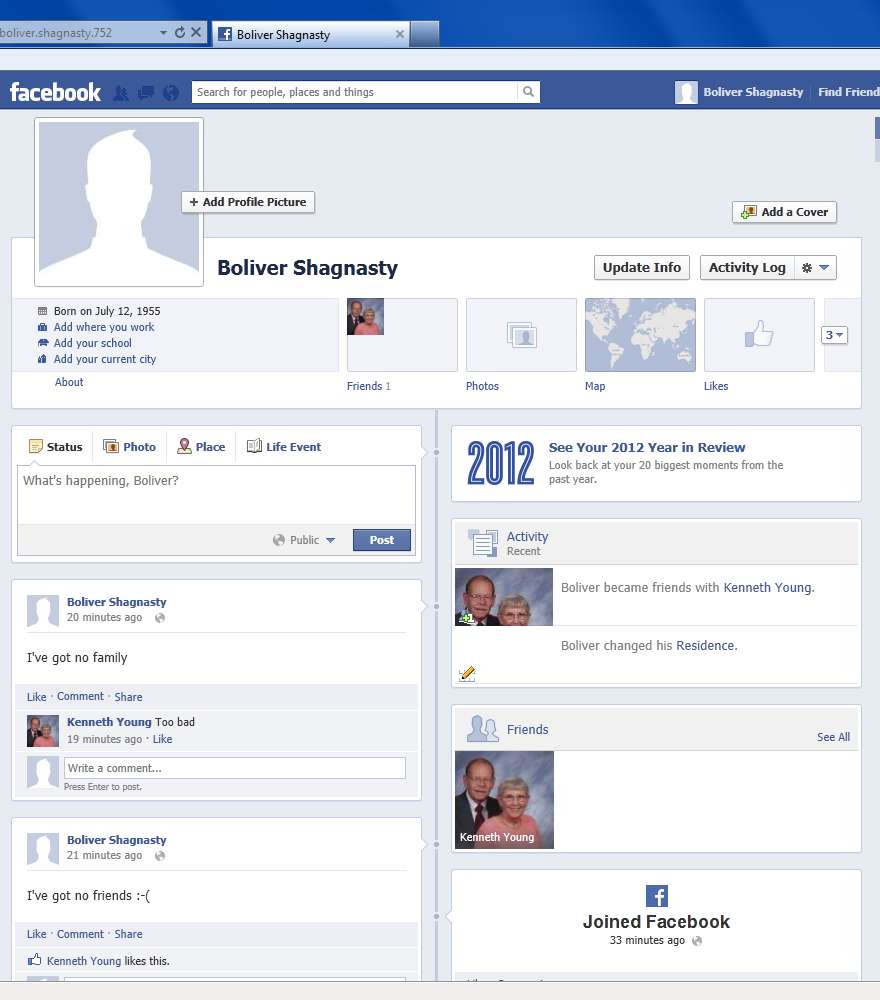
BS Facebook Page as BS sees it.
Here is a view of my dad’s Facebook page showing the posts from the BS account and my dad’s likes and comments.
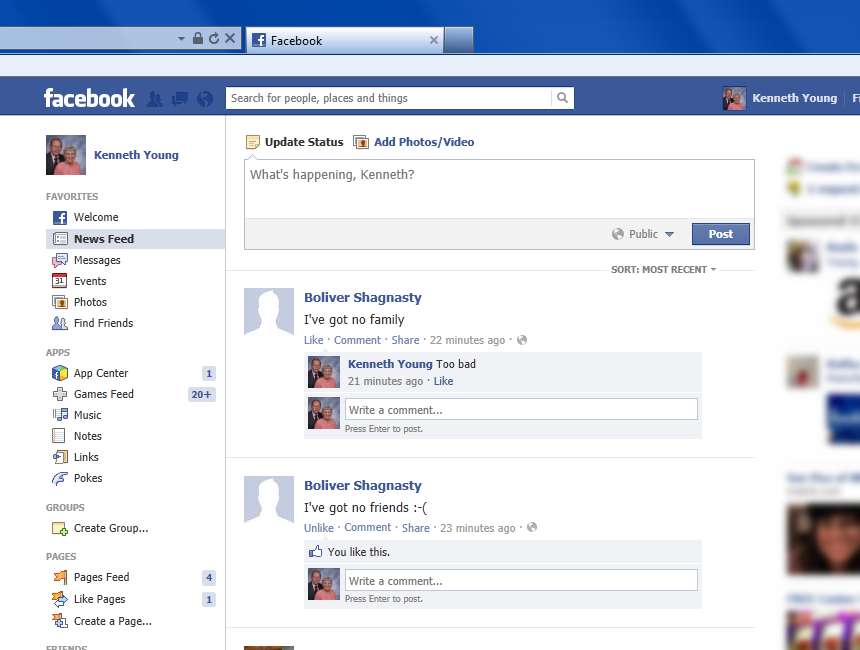
Dad’s FB Page Showing BS Posts
Let’s look at my dad’s privacy settings and you can see that his default is set to “Public”. It was that way when he liked and commented the BS posts.
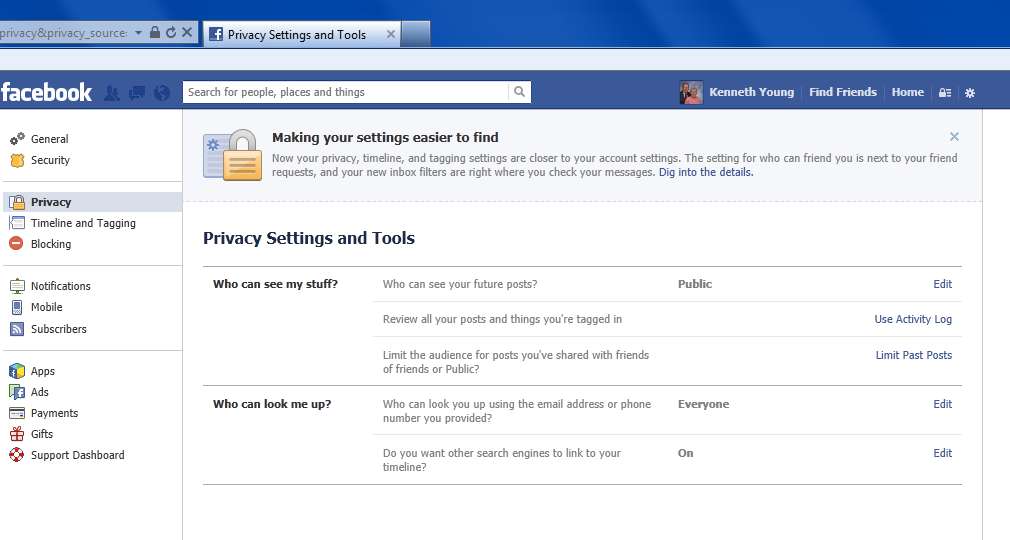
Dad’s FB privacy settings “Public”
So now let’s recap this… Both my dad and BS have all of their settings set to public. If we are to believe all of the dire warnings about everyone knowing every time you like or comment something then when I log into my own Facebook account under Chris Young, I ought to be able to see all of the activity going on between my dad and BS. Note that I am not friends with the BS account only with my dad (and a bunch of other people of course). When I looked at my timeline there was no indication that my dad had done anything that was publicly viewable. Just to make sure, I viewed my dad’s page while logged in under my account. Here is the screen capture. You can note that it is logged in under my account because my name is in the upper right corner. You can see that the only activity viewable to me in this regard was that my dad had added Boliver Shagnasty as a friend. Even when I take the trouble to view my dad’s wall, I cannot see that he liked or commented on anything from Boliver. As usual you can click the image to see it full size.
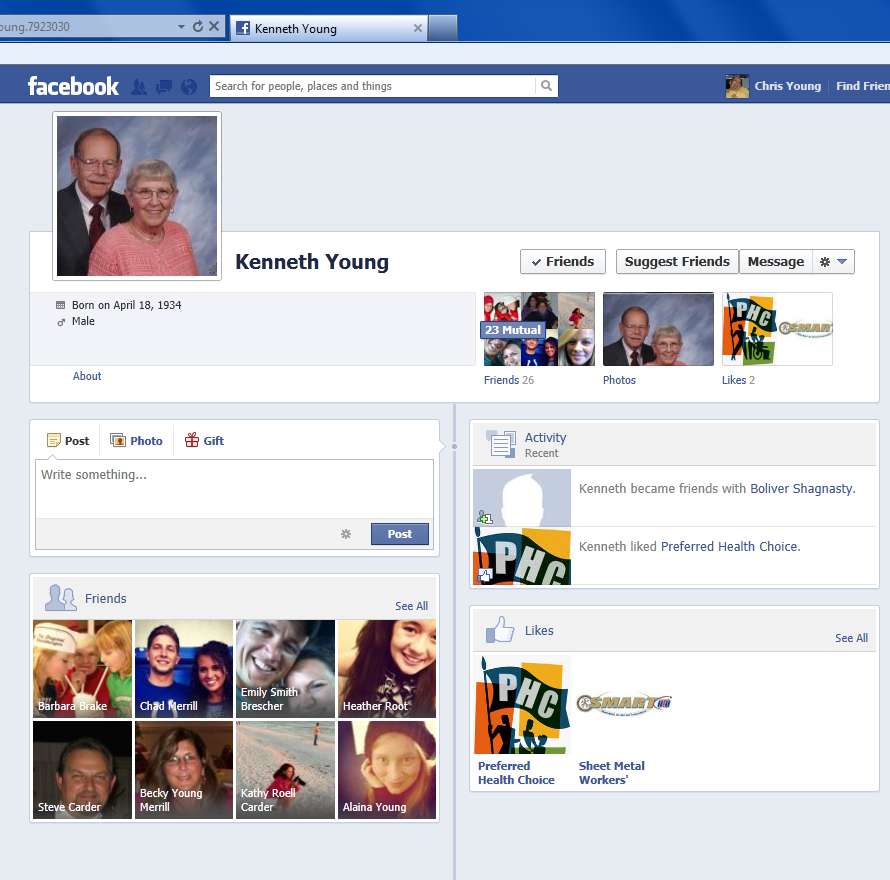
Dad’s FB Wall as I see it
So even though my dad and BS both are fully public, I cannot see my dad’s activity regarding the BS posts by looking at either my wall or my dad’s wall. So then I try finding the BS account from my Facebook account and I can indeed see it. That’s no surprise because the BS account is in fact a public viewable account. The point is the only way I would know that account exists is if I would do a search on the name or I would happen to notice that my dad was friends with that person. Also since my dad is a friend, Facebook might recommend Boliver Shagnasty as a friend I might want to add. But other than that he would remain a mystery to me.
So suppose your name is Boliver Shagnasty and you don’t want Kenny Young’s friends viewing your posts. We’ve already proved that they are not going to stumble onto your posts just because Kenny likes them or comments upon them. But they could see that the two of you are friends and they could view your posts because after all you’ve made them public by default. Now let’s log into the BS account and say something nasty about Chris that we don’t want him to see. First we will change our privacy settings on the BS account to “friends” and post a message publicly on our wall. This screen grab (click to enlarge) shows us logged in under the BS account showing the BS wall. Note that in the box where you type a new post in the lower right corner is the word “friends” instead of the word “public”. That tells us that any post we make from now on will be visible only to friends. The screen grab shows a post that was made after the default setting was sent to friends. Obviously this is something that Mr. Shagnasty would not want me to see.
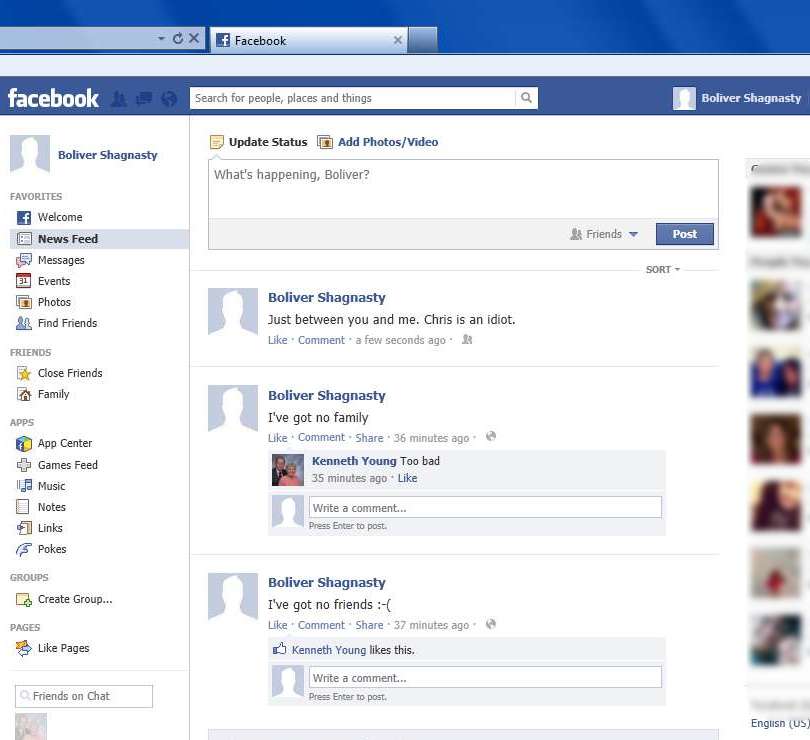
BS posts a private message
Now let’s see if Kenny can see it. The image below is logged in under Kenny’s account and the sarcastic friends only message from BS is visible. Just to make sure, Kenny likes and comments upon this message. Note that Kenny’s wall box at the top still says “Public” which theoretically means anything that he posts is visible to anyone.
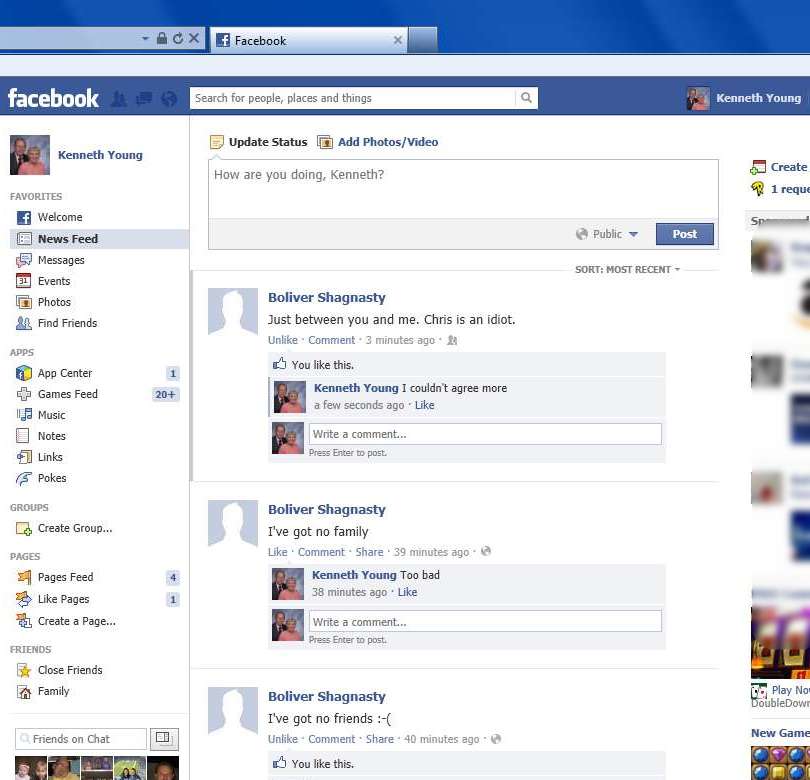
Dad views is wall seeing BS friend only posts. He likes and comments it.
Now let’s see if I can see what my dad and BS are talking about. I’m logged and under my account (notice my name in the upper right corner). I’m looking at my dad’s wall. I mentioned before that when I look at his wall I cannot see any of the BS posts. Just to prove that I can see posts between my dad and myself I have put up some test messages. One is a comment I made on my dad’s wall saying “I see you have a new friend”. Similarly my dad has posted a public “test message”. Those are visible to me by looking at his wall. I could also see his test message by looking at my wall (not shown here). The point of the image below is what you cannot see. You can see neither public nor private posts from BS. While logged into my account I can SEE NO EVIDENCE that my dad liked or commented upon anything related to BS.

My view of Dad’s wall with no BS activity
Now we get to the most important screen grab of all. I’m logged in under my own account as you can see my name in the upper right corner. This is my view of the BS account. I’m not friends with this person but I can do a search and find their name or I can note that they are friends with my dad and call up their name from there. Since they are friends with my dad then FB might also recommend them as possible friends to me but at this point I’m not friends with Boliver Shagnasty at all. The image below shows my view of his account. As expected, I can see his public posts. I can see that my dad liked them and commented upon them. What I cannot see is his private post saying that Chris is an idiot.
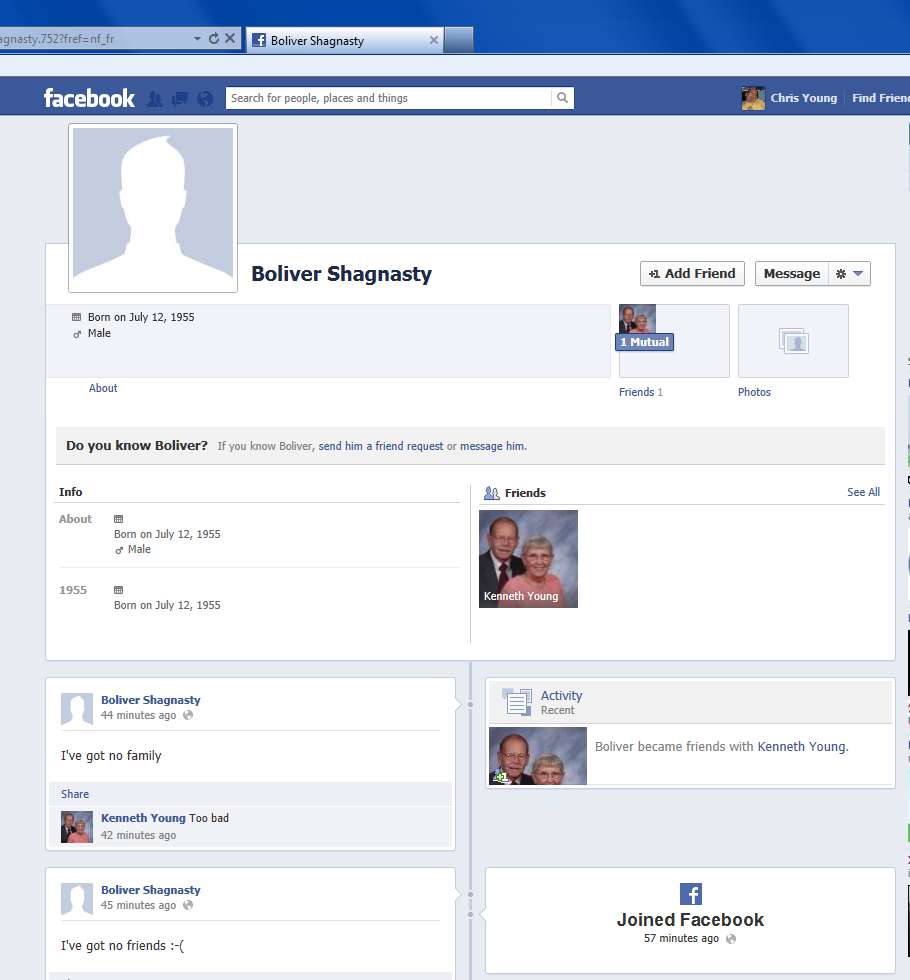
My view of the BS page which shows ONLY public activity.
So the bottom line is that the only thing you need to do to protect your own privacy is to make your own account “friends only”. There’s nothing that I can do to make your account private. Only you can do that. You do not need to ask all of your friends to hover over your name or click anything. If you want to make your account private then do so.
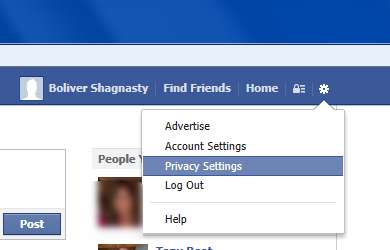 Go in the upper right corner of your screen and there is a little gear symbol. That’s the master settings for your Facebook account. You can click on it and then click on privacy settings and it will take you to detailed menus that allow you to change all aspects of your settings. As shown here on the left.
Or actually there is a new and better way to do it. Next to the gear there is a little icon that looks like a padlock. Click on it and it will take you to various shortcuts for your privacy settings. After it drops down, you should click on “Who could see my stuff?” And you’ll get a drop-down menu which looks like the image below. Note that in this case Boliver has already changed his settings from public to “friends”. If you’re says “public” then you just click on it to change it.
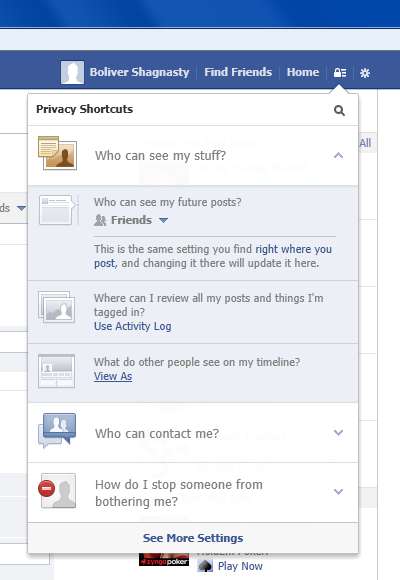
FB privacy shortcuts drop-down
Finally if you want to double check how others see you there is an option for that as well. On the same drop-down menu the third item is “view as”. If you click on it, it will show you what your page looks like as other see it. It will show you how the public sees it or you can optionally change it to see how anyone else either individuals or friends or whatever will see your wall. Here is an example of the “view as” screen for the BS account. It compares exactly to what I can see from the Chris Young account which is not a BS friend (your opinion may vary).

The FB “view as” option.
If you go back to the original message that prompted all this it tells you to hover your mouse over your friends names (each of them one by one) and then hover over the word “friend” and then change the settings. Indeed there is one that is clicked by default called “likes and comments”. I will admit 100% that I have no idea what these options do or do not do. But that really doesn’t matter if you follow the logic of everything that I’ve posted above. It is my opinion that you only thing you need to do to protect your own privacy is to set your default setting to “friends” and only friend people with whom you wish to share your information. As long as your basic privacy setting is as such, I do not believe that if I comment upon your posts or that if I like your posts that it in any way violates your privacy with people with whom you have not already friended. I invite you to prove me wrong.
So stop asking me to do anything to protect your privacy! And feel free to share this post with anyone you like. My account remains public.
Epilogue: shortly after posting this blog, I found a tiny bit of privacy loophole. It still doesn’t invalidate my basic premise but it is something you ought to be aware of if you comment on other people’s posts. Read the complete details in the next installment of this blog by clicking here.
Further update: I have verified all of the procedures mentioned in this article and they still work as I described them as of October 10, 2013.