In the 1986 film “Star Trek IV: The Voyage Home” Captain Kirk and his cohorts are on board a stolen Klingon warbird and they have to go back in time to capture a humpback whale in order to save the planet… You know like you do.
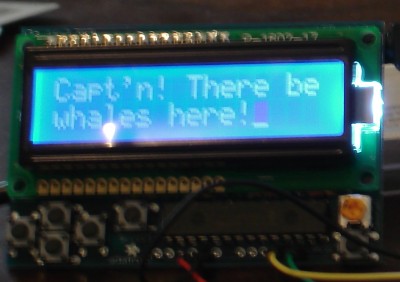
After building a giant water tank in the cargo hold, Scotty has to try to beam on board a pair of whales and the water to hold them of course using a Klingon transporter which he probably has never used before. When it all works Mr. Scott proudly declares in his thick Scottish brogue “Capt’n! There be whales here!” There is a hint of surprise in his voice as if he is really saying “Holy $#!+ I can’t believe this worked!”
Scotty’s line “There be whales here” has become a euphemism for “Eureka!” or any other exclamation of surprise in my household especially when working on computers or other electronic gadgets. It very succinctly expresses my combined feelings of “Oh yeah I did it, I’m cool” and “I can’t believe this worked”.
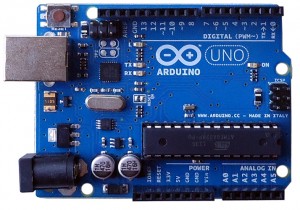
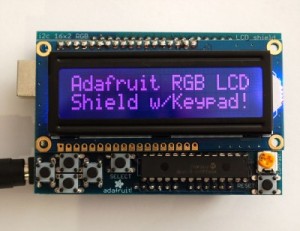
We had one of those moments here last night but it didn’t come easy. In the previous post of this blog I said I bought a new Arduino Uno single board computer for making gadgets. We tried a variety of little experiments to make an LED blink or to move a servomotor but to make the project that I really want to do work properly we need to hook up my 16 character by 2 line LCD text display. The computer board fortunately came assembled but the LCD text display came in kit form. In addition to the display module there is a data processing chip, a little variable resistor, and full of other resisters, and some pushbuttons that you can use to move a cursor up, down, left, right, and select. It didn’t take dad very long with a soldering iron to throw the thing together. There were very clear step-by-step instructions on the website where I purchased the kit. The image below shows the assembled units.
The circuit board on the lower right is the computer itself. The white thing up above it is a electronic breadboard that lets you plug components in and connect them together just by sticking the wires in the holes. In the display unit with the little buttons on it is on the left. I also downloaded a sample program that was posted display the text “Hello World!” on the display. Then if you pushed any of the buttons it would display the text “Up”, “Down”, “Left”, “Right”, “Select” depending on which button you push. Pretty simple right? Of course not… It never is.
We hooked it all up and I loaded the program and the backlight on the LCD blinked on briefly but nothing seemed to work. I double checked that the program was uploading correctly. We took a long look at all the wires connecting the display to the computer. And we finally concluded it had to be a bad solder joint somewhere. Dad went back and tried looking at all of his joints using an eye loop. When the opening “Hello World!” message didn’t appear, I didn’t bother trying pushing any of the buttons originally. While I was tinkering with something else, dad tried pushing one of the buttons and we realize that if you push the “Up” or “Down” buttons it would light up and display the text. But if you pushed any of the other buttons, the backlight turned off in the text disappeared. Again I concluded it had to be a bad liar somewhere and dad went back to his workbench inspecting his work yet again.
By now it was getting late in the evening. I wanted to watch the rest of the Pacer game and get caught up on the NASCAR race so we gave up for the evening. I shut down the computer, we went in the living room and I had my usual evening snack of milk and chocolate chip cookies while we watched NASCAR. I was just about to go the bed when all of a sudden I figured out what had gone wrong. Dad said “Let me guess it’s software isn’t it?” I humbly and somewhat shamefully answered “yes it is”. I finished up my snack, turn the computer back on, fixed the software, and got ready to upload it. Dad yelled in from the other room “I don’t hear any exclamations about whales in there.” I yelled back “there will be soon”. As a last step I edited out the “Hello world” text and put in “There be whales!”. It worked!
The problem was that the program was originally written for an LCD display with a multicolor backlight consisting of red, blue, green LEDs. The one that I had installed was only a single color backlight in so it only used one of the three backlight driving pins. The sample program was set up so that every time you pushed a button, the background color would change in addition to displaying the text corresponding to the various buttons. The background color that it tried to use for the opening message must use the red or green LEDs and I was connected to the pin for the blue LED. (Or some other combination). When you push the up or down buttons, they were displaying a color that works with my monochrome display. All I had to do was edit the program so that it always used full white background and that nature that my display always worked.
After editing the text so that it would display on 2 lines I replaced “Hello world” with this following more complete message.
I spent the rest of today reading programming manuals and learning how to use various built-in functions. The programming language is pretty much plain vanilla C/C++ but of course there are all sorts of libraries of code available to use various features of the device. I still got a small handful of parts in route from RadioShack before I can start working on the infrared emitter and detector portion of the circuit. Once I get those, I can start programming my customized remote control. Stay tuned for further updates.

