Although technically this installment of our tutorial isn’t directly related to IRLib, we are including it here as part 3c because it may be necessary to do these steps if you want to use the example in part 3b of our tutorials.
We’re going to take you step-by-step through installing Python and other necessary modules on a Windows system. We used this method on a Windows 7 64-bit home premium PC. Other versions of Windows will have extremely similar installations.
In order to use the previous examples, we highly recommend that you use Python 2 rather than Python 3 and we recommend that you use the 32-bit version even if you are on a 64-bit Windows machine. You might be able to get our examples to work under 64 bits or Python 3 but we were warned there might be problems and we did encounter them and chose not to try to come up with workarounds.
Installing the Python Interpreter
Python is an interpreted language rather than a compiled language. The Python interpreter is a program that runs on your PC, reads the text script of your Python program and executes the script rather than compiling it into native machine language for your type of hardware. You can download the Windows version of Python 2 or 3 at…
http://www.python.org/download/releases/
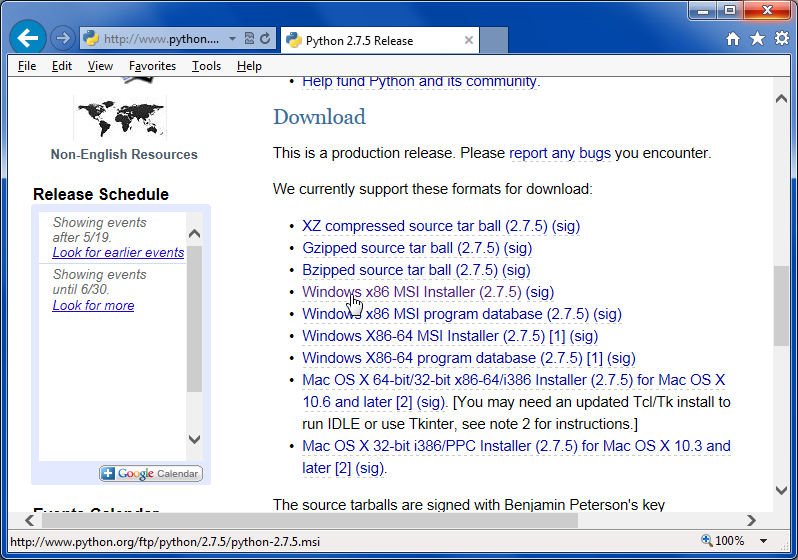
As of this writing the most recent version of Python 2 is 2.7.5 dated May 15, 2013. Download the file named “Windows x86 MSI Installer (2.7.5) (sig)” you can save the program and run it from the same location or run it immediately.
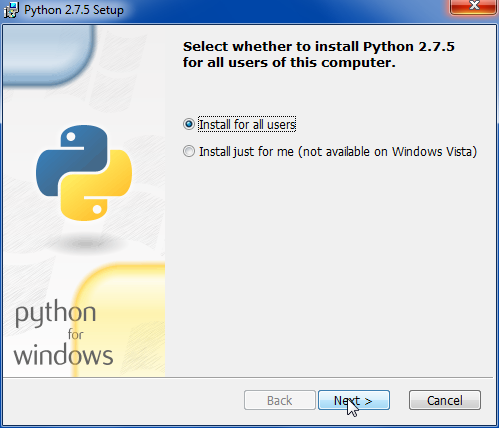
 Install the program for all users.
 Choose your directory. The default will work.
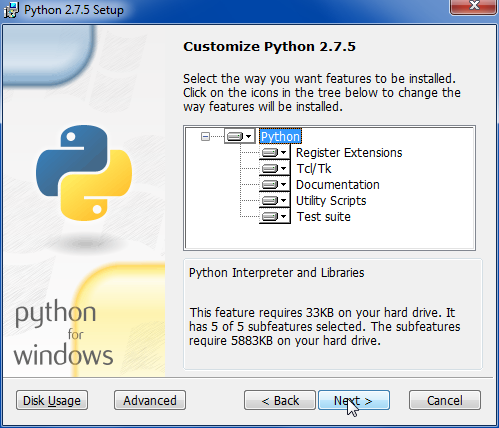
The default for customization is install everything. That will work fine.
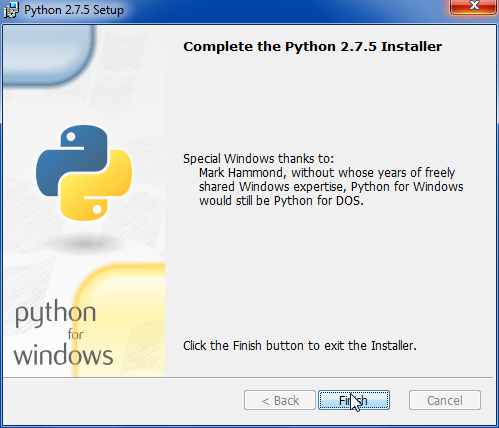
And complete the installation
 When you completed the installation the following items will be in your start menu.
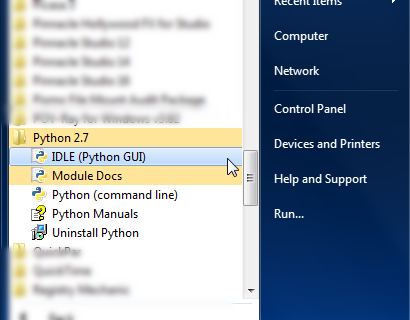 There is a command line version that can run scripts directly or there is an IDE called “IDLE”. In our previous installment of the tutorial we use the IDE.
There is one more item we need to do to complete this installation. We need to add the Python interpreter to the default system path so that when you try to execute a Python script it will know where to find the interpreter. The process is slightly different on Windows XP versus Windows Vista, 7, or 8.
Adjusting the path on Windows Vista, 7, or 8…
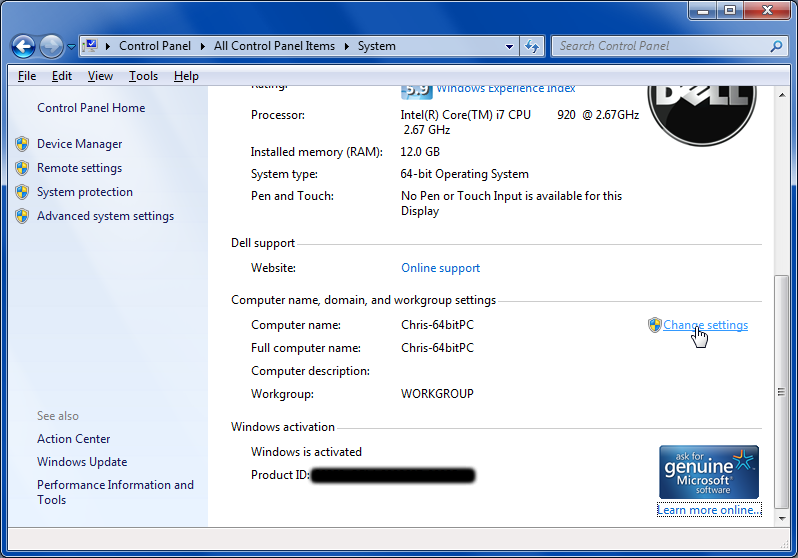
Go to your Control Panel and click on “System”. If you are in icon view you can click on “System” directly. If you are in category view you should click on “System and Security” and then click on “System”. You should next click on “Change Settings” as shown here
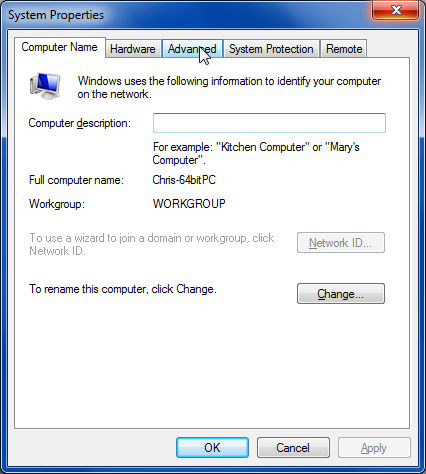
 You will get a system properties dialog that looks like this. You should click on the “Advanced” tab.
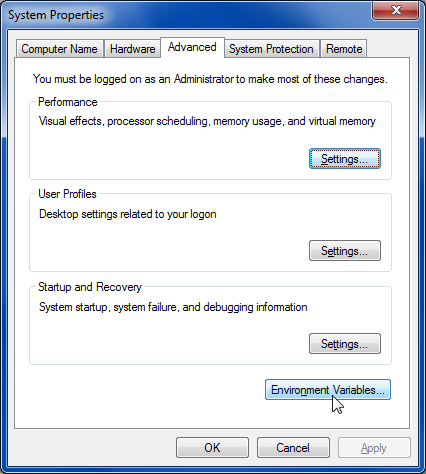
 Next click on environment variables.
 You’ll get the Environment Variables dialog which looks like this.
In the upper section look for the item “Path”. Select it and click on “Edit” just below it.
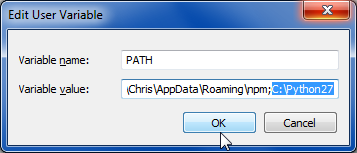 Then very carefully go to the end of the variable value and add a semicolon followed by the path where you installed Python. Make sure do not erase any other text that was previously there. On my system I added “;C:\Python22” to the end of the value. Then click on okay and continue out of all of the open dialogues. You can now proceed to the next section where we will install pySerial.
Adjusting the path on Windows XP
Go to your Control Panel and click on “System”. If you are in classic icon view you can click on “System” directly. If you are in category view you should click on “Performance and Maintenance” and then click on “System”. Unlike later versions of Windows, this will take you directly to the “System Properties” dialog. You do not need to click on any “Change Settings” link. It will look like this…
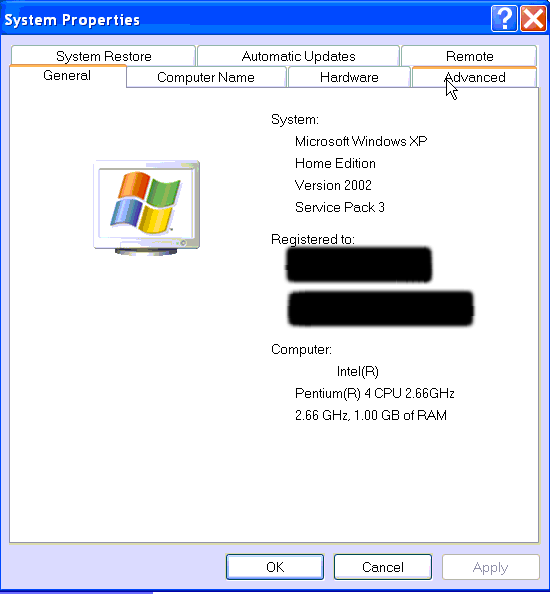 Click on the tab labeled “Advanced” and it will look like this
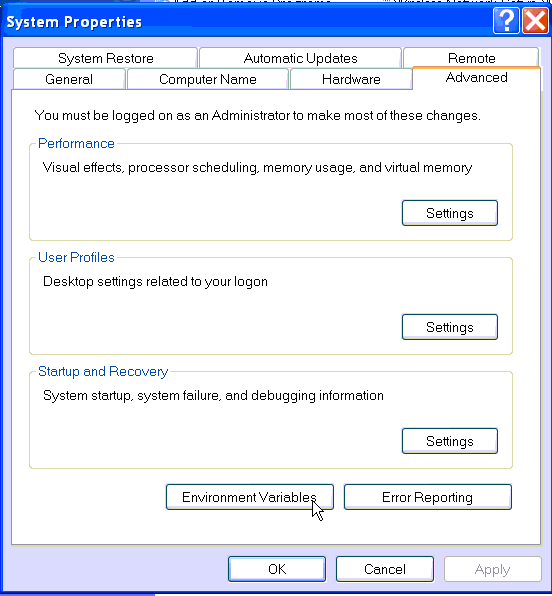 Click on the “Environment Variables” button and you will see the following dialogue.
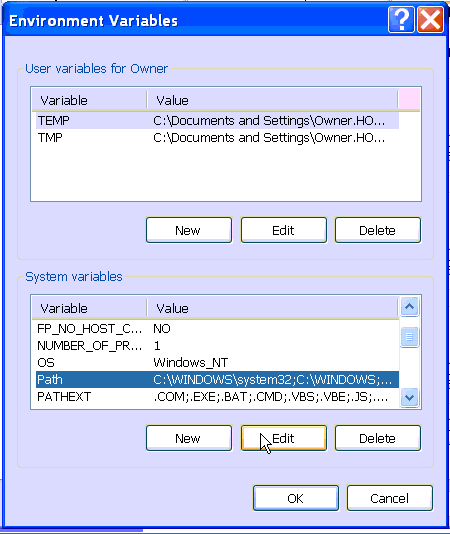 In the lower section look for the item “Path”. Select it and click on “Edit” just below it.
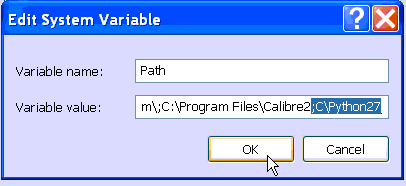 Then very carefully go to the end of the variable value and add a semicolon followed by the path where you installed Python. Make sure you do not erase any other text that was previously there. On my system I added “;C:\Python22” to the end of the value. Then click on okay and continue out of all of the open dialogues. You can now proceed to the next section where we will install pySerial.
Installing PySerial
Next we will install the PySerial module which will allow us to do serial communication through Python. The main page for the PySerial code is…
http://pyserial.sourceforge.net/
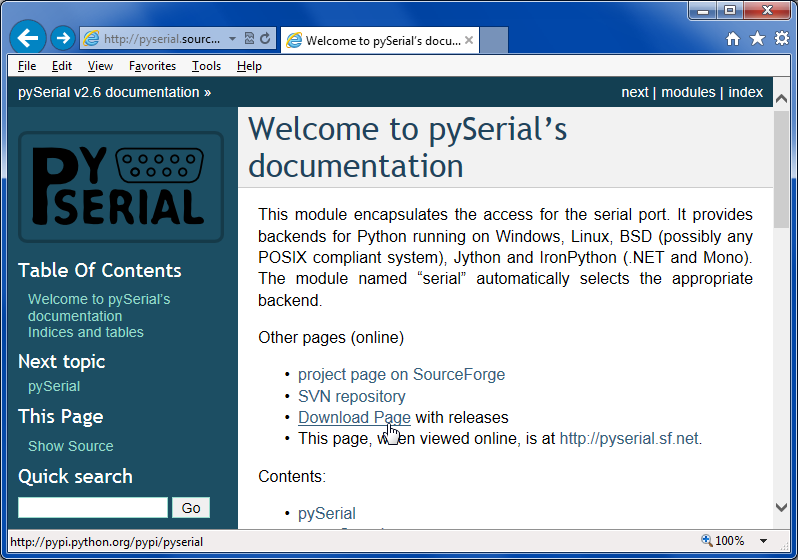
Click on the “Download Page” link as shown here
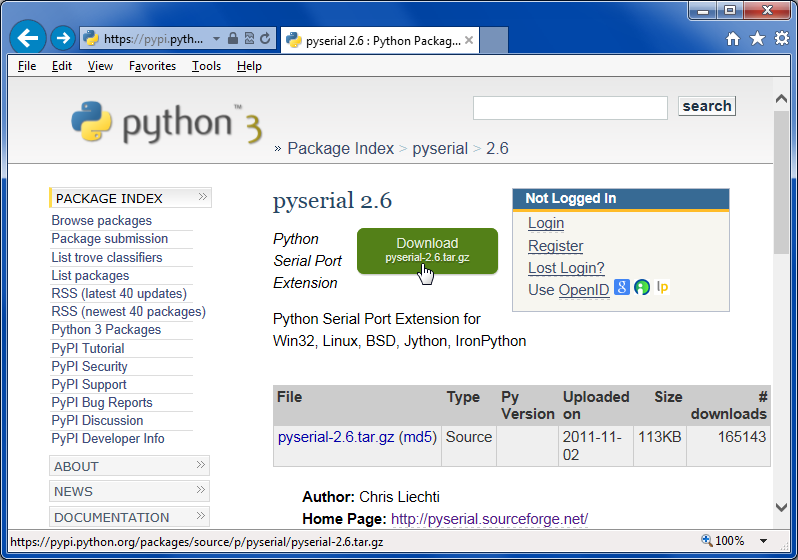
 At click on the big green download button. Save the file to a convenient location. Note that the version “2.6” refers to the pySerial version and not to the version of Python which you are running.
 Unzip the file. If you do not have a utility that can handle .tar.gz compressed files we recommend using “7 Zip” which can be downloaded here…
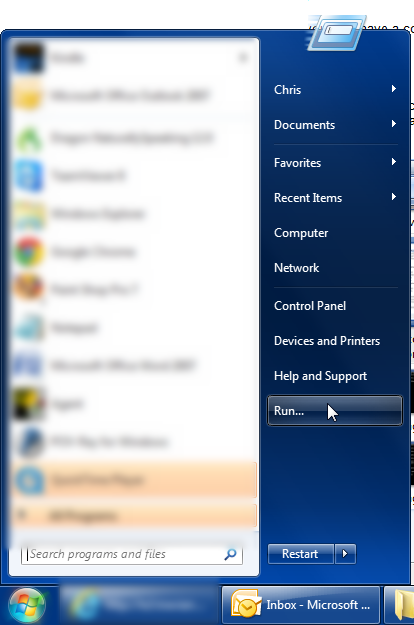
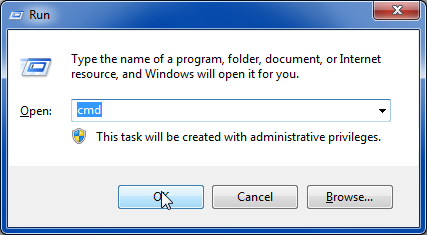
Now we will have to do something that Windows users rarely do. We need to type some command lines to install the package. Click on your start button and choose the “run” command and then type “cmd”.
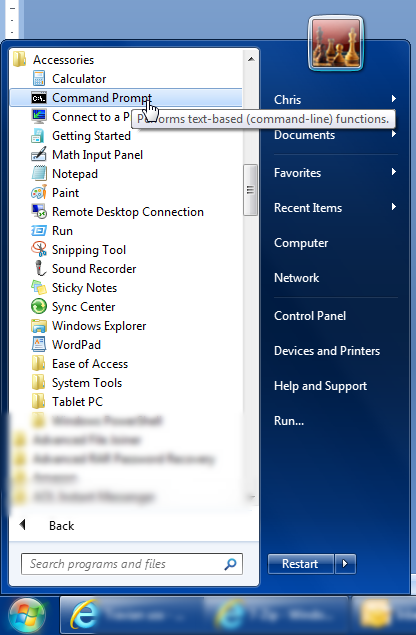
Or alternatively you may have a command prompt shortcut in your start menu under accessories as shown here.
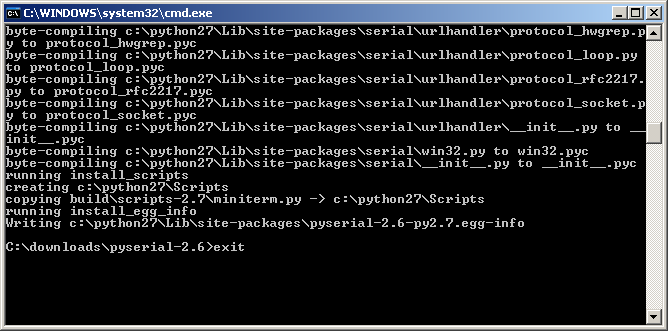
When the command line window comes up you need to change directories to where you unzipped the pySerial package. In my case it was in the c:\downloads\pyserial-2.6 so the command was…
cd c:\downloads\pyserial- 2.6
Then type the following command…
python setup.py install
When the installation is complete type “exit”
Instructions for Installing Pygame
Our final step is to install the Pygame package. You can download it at
Click on the download link in the upper left menu
Scroll down to the section for windows and click on the link labeled “pygame-1.9.1.win32-py2.7.msi”
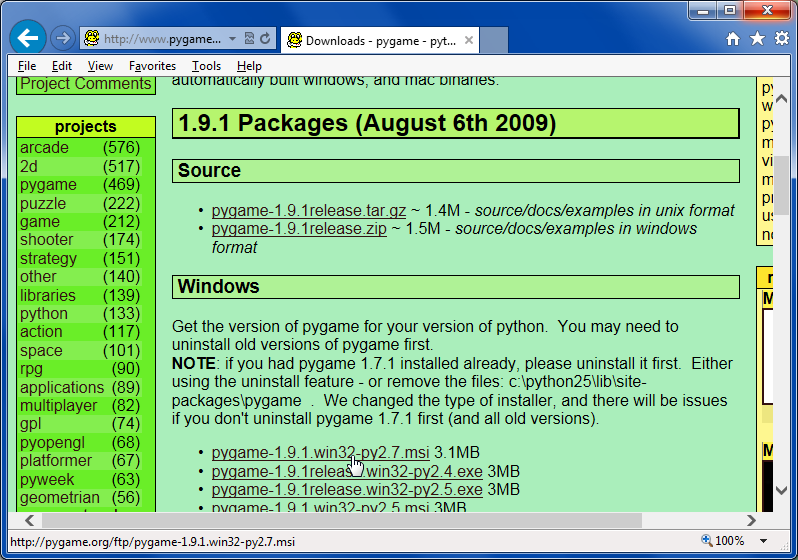
Or whatever the most recent 32-bit Windows installer link is. Simply run the installer and use all of the default settings to complete installation.
That’s everything you need to know to install Python, PySerial and Pygame on a Windows machine.
If you are using a Raspberry Pi you will already have Python and Pygame installed with the standard version of Raspbian. To install PySerial simply go to a command prompt and type
sudo apt-get install python-serial
This tells it to issue a superuser command to get the package and install it. In the next installment of this tutorial we will talk about how to install the Arduino IDE on a Raspberry Pi.


Many thanks for the “pygame” installation tutorial. However my attempts failed miserably until I noted a discrepancy between the Python 3.3.3 error message and the pygame init file.
I am using Windows Vista 32bit on a legacy machine and am installing Python 3.3.3 and Pygame 1.9.2a0.
Installing pygame worked OK using the defaults, but when I ran the command “import pygame” I got this error:
Traceback (most recent call last):
File “”, line 1, in
import pygame
File “C:\Python33\lib\site-packages\pygame\__init__.py”, line 95, in
from pygame.base import *
ImportError: DLL load failed: The specified module could not be found.
So I used Windows Explorer and looked into:
“C:\Python33\lib\site_packages\pygame” and saw the file “__init__.py” was listed as “__init__” – no “.py” extension.
Solution was to RENAME file to “__init__.py”
I ran “import pygame” again and it works fine.
Please pass this message on 🙂
Thank you for posting this comment about your installation issues with pygame. Although I did not encounter such problems myself perhaps some other readers may have encountered it. That blog is a little bit old and install scripts perhaps have changed or you may be using a different version than I was using. Again thanks for the helpful tip.