Somebody proved me (slightly) wrong.

In my previous post in this blog I gave a lengthy demonstration in an attempt to disprove a recent message that has been making the rounds on Facebook regarding privacy when using the like and comment features. Facebook message says that you ask your friends and family to go through lengthy procedures to secure your own privacy. At the end of the explanation I challenged people to prove me wrong. Much to my surprise at least two people inadvertently did prove me wrong. At least partially wrong.

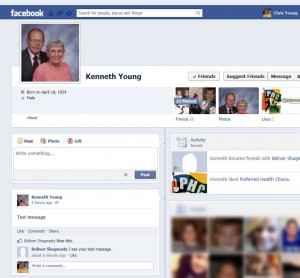
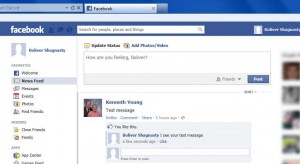
While everything that I said in the original post was true, there was one other privacy issue that I was unaware of and did not test. Here’s what happened… I posted a link to the blog as a comment on a couple of different people who posted the original Facebook message. People who I did not know commented on my comment and liked my comment. I was able to see their comments and likes. Here’s an image that shows what I’m talking about. The image below shows the original message that I first showed at the beginning of the previous blog. Below that there was a comment from someone I didn’t know but I could see their name and the comment. Then you see where I posted the link to my blog as a comment. Then the person who had commented before both liked and commented again. You can click on the image to enlarge it as always.

Comments and likes from stranger

Comments and likes from stranger

Anyone who uses Facebook on a regular basis has seen this behavior but I’ve never really thought about it in terms of privacy. One question that came to mind… Did this person who liked my comment and who commented upon my comment have their profile set to “public” or to “friends”? To verify this I had the BS account go back in like and comment upon the test message from my dad. Here’s what that looks like. Note this is as seen from the BS account in his privacy setting is still “friends”.

Mr. Shagnasty likes and comments my dad's post.

Mr. Shagnasty likes and comments my dad’s post.

So my original post implied that the only thing you need to do to keep your own information private was to set your privacy settings to “friends”. That is not 100% true. Regardless of what your privacy settings are, anytime you like or comment on someone else’s wall (or presumably images etc. as well) your comments and likes will probably be visible to anyone.

Now I logged into my own personal account. Remember that I’m not friends with Mr. Shagnasty. When I look at my dad’s page I can see his public post titled “test message” and I can see that Boliver Shagnasty has both liked and commented upon it. This is despite the fact that BS’s privacy settings are set to “friends”. Here is what my dad’s post looks like from my account.

My view of dad's wall with BS comments

My view of dad’s wall with BS comments

So if you post on your timeline “To celebrate New Year’s Eve I’m going to rob a bank” then only your friends will see it. However if one of your friends writes “What are you doing on New Year’s Eve?” and you comment in reply “I’m going to rob a bank” then it will be public. Or at least as public as your friends post was. This “loophole” that I’ve discovered doesn’t really have anything to do with the wording of that original Facebook warning. The original warning said “… with the recent changes in FB, the “public” can now see activities in ANY wall. This happens when our friend hits “like” or “comment” ~ automatically, their friends would see our posts too.” I still believe that I have proved that statement is incorrect and challenge anyone again to prove me not slightly wrong but completely wrong.

What am I doing for New Year’s Eve? Sitting home updating my blog and watching NCIS on my DVR. At least that’s all I’m saying in public 🙂

Facebook Privacy Not As Bad As You Think

It never ceases to amaze me how misinformation defies the laws of physics and seems to travel faster than the speed of light. This especially seems to be true when the message contained something scary. And there is nothing more scary it seems than losing one’s privacy. The most recent scare tactic comes in a message that you’ve probably seen it looks like this.

Recent Facebook Privacy Warning

Recent Facebook Privacy Warning

My usual source for debunking myths is Snopes.com. However this post from them which they described as “mixed” true and false was so confusing to even me that I wasn’t sure what the real deal was. That inspired me to conduct some experiments of my own.

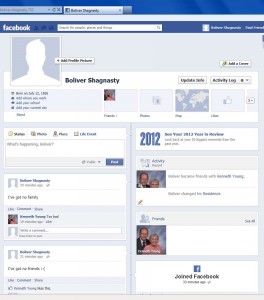
I created a fake profile on Facebook with the name “Boliver Shagnasty”. That was the name of a character that the late great comedian Red Skelton used to play. Legend has it that my father wanted to name me this when I was born. It was a brand-new account with whatever the default privacy settings were going to be. I posted two posts on his own wall. I sent a friend request to my dad’s Facebook account and then logged in under my dad’s account and accepted the friend request. I then had my dad “like” one of the posts and “comment” on the second post. Here is a screen capture of the Boliver Shagnasty Facebook page logged in as himself. You can see that he is logged in under his own account because his name is in the upper right corner. You can click on this image to see it full size. I know it’s unreadable as is.
BS Facebook Page as BS sees it.

BS Facebook Page as BS sees it.

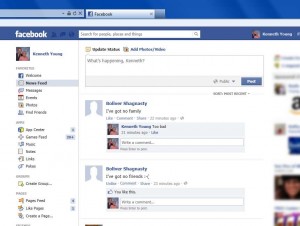
Here is a view of my dad’s Facebook page showing the posts from the BS account and my dad’s likes and comments.
Dad's FB Page Showing BS Posts

Dad’s FB Page Showing BS Posts

Let’s look at my dad’s privacy settings and you can see that his default is set to “Public”. It was that way when he liked and commented the BS posts.
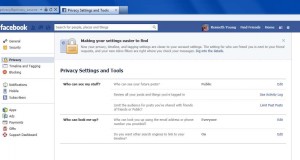
Dad's FB privacy settings "Public"

Dad’s FB privacy settings “Public”

So now let’s recap this… Both my dad and BS have all of their settings set to public. If we are to believe all of the dire warnings about everyone knowing every time you like or comment something then when I log into my own Facebook account under Chris Young, I ought to be able to see all of the activity going on between my dad and BS. Note that I am not friends with the BS account only with my dad (and a bunch of other people of course). When I looked at my timeline there was no indication that my dad had done anything that was publicly viewable. Just to make sure, I viewed my dad’s page while logged in under my account. Here is the screen capture. You can note that it is logged in under my account because my name is in the upper right corner. You can see that the only activity viewable to me in this regard was that my dad had added Boliver Shagnasty as a friend. Even when I take the trouble to view my dad’s wall, I cannot see that he liked or commented on anything from Boliver. As usual you can click the image to see it full size.
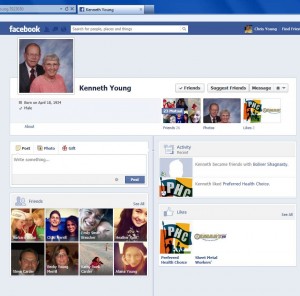
Dad's FB Wall as I see it

Dad’s FB Wall as I see it

So even though my dad and BS both are fully public, I cannot see my dad’s activity regarding the BS posts by looking at either my wall or my dad’s wall. So then I try finding the BS account from my Facebook account and I can indeed see it. That’s no surprise because the BS account is in fact a public viewable account. The point is the only way I would know that account exists is if I would do a search on the name or I would happen to notice that my dad was friends with that person. Also since my dad is a friend, Facebook might recommend Boliver Shagnasty as a friend I might want to add. But other than that he would remain a mystery to me.

So suppose your name is Boliver Shagnasty and you don’t want Kenny Young’s friends viewing your posts. We’ve already proved that they are not going to stumble onto your posts just because Kenny likes them or comments upon them. But they could see that the two of you are friends and they could view your posts because after all you’ve made them public by default. Now let’s log into the BS account and say something nasty about Chris that we don’t want him to see. First we will change our privacy settings on the BS account to “friends” and post a message publicly on our wall. This screen grab (click to enlarge) shows us logged in under the BS account showing the BS wall. Note that in the box where you type a new post in the lower right corner is the word “friends” instead of the word “public”. That tells us that any post we make from now on will be visible only to friends. The screen grab shows a post that was made after the default setting was sent to friends. Obviously this is something that Mr. Shagnasty would not want me to see.
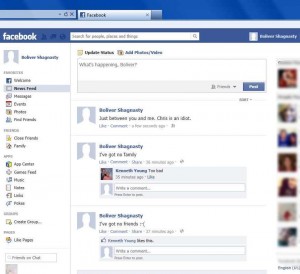
BS posts a private message

BS posts a private message

Now let’s see if Kenny can see it. The image below is logged in under Kenny’s account and the sarcastic friends only message from BS is visible. Just to make sure, Kenny likes and comments upon this message. Note that Kenny’s wall box at the top still says “Public” which theoretically means anything that he posts is visible to anyone.
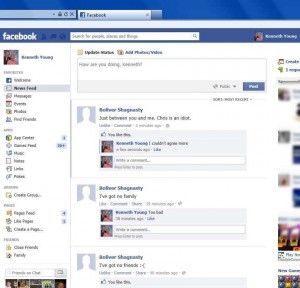
Dad views his wall seeing BS friend only posts. He likes and comments it.

Dad views is wall seeing BS friend only posts. He likes and comments it.

Now let’s see if I can see what my dad and BS are talking about. I’m logged and under my account (notice my name in the upper right corner). I’m looking at my dad’s wall. I mentioned before that when I look at his wall I cannot see any of the BS posts. Just to prove that I can see posts between my dad and myself I have put up some test messages. One is a comment I made on my dad’s wall saying “I see you have a new friend”. Similarly my dad has posted a public “test message”. Those are visible to me by looking at his wall. I could also see his test message by looking at my wall (not shown here). The point of the image below is what you cannot see. You can see neither public nor private posts from BS. While logged into my account I can SEE NO EVIDENCE that my dad liked or commented upon anything related to BS.

My view of Dad's wall with no BS activity

My view of Dad’s wall with no BS activity

Now we get to the most important screen grab of all. I’m logged in under my own account as you can see my name in the upper right corner. This is my view of the BS account. I’m not friends with this person but I can do a search and find their name or I can note that they are friends with my dad and call up their name from there. Since they are friends with my dad then FB might also recommend them as possible friends to me but at this point I’m not friends with Boliver Shagnasty at all. The image below shows my view of his account. As expected, I can see his public posts. I can see that my dad liked them and commented upon them. What I cannot see is his private post saying that Chris is an idiot.
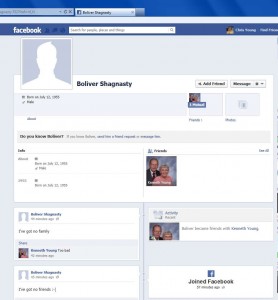
My view of the BS page which shows ONLY public activity.

My view of the BS page which shows ONLY public activity.

So the bottom line is that the only thing you need to do to protect your own privacy is to make your own account “friends only”. There’s nothing that I can do to make your account private. Only you can do that. You do not need to ask all of your friends to hover over your name or click anything. If you want to make your account private then do so.
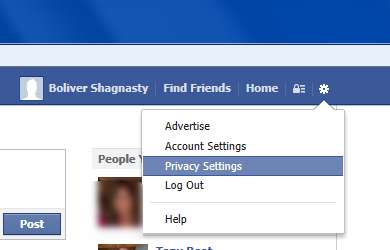
fb11Go in the upper right corner of your screen and there is a little gear symbol. That’s the master settings for your Facebook account. You can click on it and then click on privacy settings and it will take you to detailed menus that allow you to change all aspects of your settings. As shown here on the left.

Or actually there is a new and better way to do it. Next to the gear there is a little icon that looks like a padlock. Click on it and it will take you to various shortcuts for your privacy settings. After it drops down, you should click on “Who could see my stuff?” And you’ll get a drop-down menu which looks like the image below. Note that in this case Boliver has already changed his settings from public to “friends”. If you’re says “public” then you just click on it to change it.
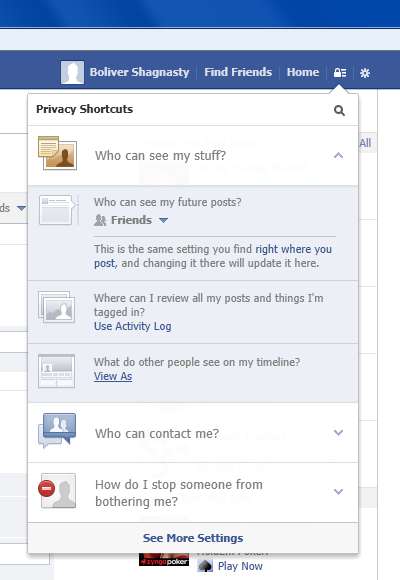
FB privacy shortcuts drop-down

FB privacy shortcuts drop-down

Finally if you want to double check how others see you there is an option for that as well. On the same drop-down menu the third item is “view as”. If you click on it, it will show you what your page looks like as other see it. It will show you how the public sees it or you can optionally change it to see how anyone else either individuals or friends or whatever will see your wall. Here is an example of the “view as” screen for the BS account. It compares exactly to what I can see from the Chris Young account which is not a BS friend (your opinion may vary).
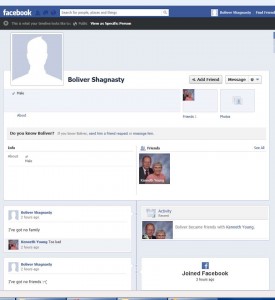
The FB "view as" option.

The FB “view as” option.

If you go back to the original message that prompted all this it tells you to hover your mouse over your friends names (each of them one by one) and then hover over the word “friend” and then change the settings. Indeed there is one that is clicked by default called “likes and comments”. I will admit 100% that I have no idea what these options do or do not do. But that really doesn’t matter if you follow the logic of everything that I’ve posted above. It is my opinion that you only thing you need to do to protect your own privacy is to set your default setting to “friends” and only friend people with whom you wish to share your information. As long as your basic privacy setting is as such, I do not believe that if I comment upon your posts or that if I like your posts that it in any way violates your privacy with people with whom you have not already friended. I invite you to prove me wrong.

So stop asking me to do anything to protect your privacy! And feel free to share this post with anyone you like. My account remains public.


Epilogue: shortly after posting this blog, I found a tiny bit of privacy loophole. It still doesn’t invalidate my basic premise but it is something you ought to be aware of if you comment on other people’s posts. Read the complete details in the next installment of this blog by clicking here.


Further update: I have verified all of the procedures mentioned in this article and they still work as I described them as of October 10, 2013.

Electric dominoes and sonic screwdrivers

As many of you know I’ve been tinkering lately with some new tiny computers. One of them is the Arduino programmable controller and the other one is the tiny Linux computer called Raspberry Pi. I’ve purchased these from a company called Adafruit.com. And unfortunately I’ve gotten addicted to visiting their website. They have a link called “New Products” and it seems to me like there’s something new there just about every day or at least several times a week. Their founder and CEO with the unusual name Limor Fried (aka “Ladyada”) was recently named Entrepreneur Magazine’s Entrepreneur of the Year 2012. You wouldn’t think a young female MIT grad with bright pink hair and studded jewelry would win such an award or get much attention but the do it yourself market and companies like hers are such a movement it even landed them a feature article in the Washington Post this week.

Their latest product is something called “littleBits” as seen here from their product catalog. It’s electronic building kit for kids young and old who want to build gadgets without having to do a bunch of wiring and soldering. Each component is a little circuit board with a connector on each end that snaps together using magnets. You simply lay the blocks end-to-end in a snap together. They even have the magnets polarized in such a way that it won’t let you wire together things that ought not to be wired together. Adafruit.com is just a distributor or reseller. For more information on all of the kits and parts available you can check out littleBits website at http://littlebits.cc/.

“littleBits” Electronics Kit as sold by Adafruit.com

The whole thing reminded me of electronics building kit I had when I was a kid that had similar blocks that were held together magnetically. You would sit the entire array of blocks on a metal plate that served as a ground plane for the circuit you were building. I couldn’t remember the name of it but after several Google searches found it was called Lectron and was made by Raytheon electronics. It was also marketed under the brand name “Electric Dominoes”. After browsing around that website awhile I concluded I must’ve had their series 3 kit shown here. It contained two transistors, a variety of resistors, capacitors, diodes and a radio tuner block as well as a battery pack and a speaker. You could use it to make blinking lights, and audio oscillator (buzzer) and an AM radio. It was one of the coolest toys I think I ever had.

Lectron Series 3 kit like I owned.

Apparently Raytheon did not invent the product it was some German engineering company who licensed it to them. Unfortunately Raytheon stopped selling them in 1969. The rights to the devices transferred to several different companies over the years. Kits are still available from some German company but all of the manuals are written in German and there are no plans to translate them. The complete history of this toy can be found at http://www.lectron.info/

While googling information about the Lectron kits, I stumbled across a website by some guy who had built his own homemade Lectron blocks. That led me on to a bunch of other websites in one of the other articles showed a guy who had made a homemade Dr. Who sonic screwdriver using an Arduino Pro Mini. They sell one commercially that not only makes sound effects and blinks that can be use as a TV remote. This homemade one does all of that and more. According to the website “Among the various features and functions that this device has are an EMF (electromagnetic field) meter, voltage detector, dog whistle, brown note tone generator, sound level meter, ohm meter, volt meter, and an IR universal remote. It can also serve as a laser pointer or a flashlight and of course there is several settings for making the LED pulse dramatical” Check out the article here.

Homemade Sonic Screwdriver

Perhaps after the holidays I will have some time to write some articles here about my own Arduino projects a potential new client I have for their use.

Oh My! Droids Building Droids!

That was one of my favorite lines from Star Wars: Episode III when C-3 PO first enters the droid factory and sees the assembly line. I thought it was funny because just about every electronic gadget you purchase today is actually built by robots. The problem is the components are so tiny that you probably couldn’t handle them even with a pair of tweezers. It takes a precision robot to place them in solder them to the boards. Is not like the old days where you bend a couple of resistor leads, shoved them through a pair of holes, solder them in and clip the leads.

As an example here is a slideshow of photos from TechRepublic.com showing the factory where Raspberry Pi single board computers are built. This is the little $40 computer that I purchased and spoke about in a recent YouTube video. Click here to see the slideshow.

My New $40 Computer

Here is a YouTube video about my new $40 computer called a Raspberry Pi. Unfortunately I misspoke when I created a video and said it only cost $30. By the time I realized my mistake I had already deleted all of the original files and could not reenter the video without starting from scratch.
 

Capt’n! There be whales here!

In the 1986 film “Star Trek IV: The Voyage Home” Captain Kirk and his cohorts are on board a stolen Klingon warbird and they have to go back in time to capture a humpback whale in order to save the planet… You know like you do.

After building a giant water tank in the cargo hold, Scotty has to try to beam on board a pair of whales and the water to hold them of course using a Klingon transporter which he probably has never used before. When it all works Mr. Scott proudly declares in his thick Scottish brogue “Capt’n! There be whales here!” There is a hint of surprise in his voice as if he is really saying “Holy $#!+ I can’t believe this worked!”

Scotty’s line “There be whales here” has become a euphemism for “Eureka!” or any other exclamation of surprise in my household especially when working on computers or other electronic gadgets. It very succinctly expresses my combined feelings of “Oh yeah I did it, I’m cool” and “I can’t believe this worked”.

We had one of those moments here last night but it didn’t come easy. In the previous post of this blog I said I bought a new Arduino Uno single board computer for making gadgets. We tried a variety of little experiments to make an LED blink or to move a servomotor but to make the project that I really want to do work properly we need to hook up my 16 character by 2 line LCD text display. The computer board fortunately came assembled but the LCD text display came in kit form. In addition to the display module there is a data processing chip, a little variable resistor, and full of other resisters, and some pushbuttons that you can use to move a cursor up, down, left, right, and select. It didn’t take dad very long with a soldering iron to throw the thing together. There were very clear step-by-step instructions on the website where I purchased the kit. The image below shows the assembled units.

My Assembled Arduino

The circuit board on the lower right is the computer itself. The white thing up above it is a electronic breadboard that lets you plug components in and connect them together just by sticking the wires in the holes. In the display unit with the little buttons on it is on the left. I also downloaded a sample program that was posted display the text “Hello World!” on the display. Then if you pushed any of the buttons it would display the text “Up”, “Down”, “Left”, “Right”, “Select” depending on which button you push. Pretty simple right? Of course not… It never is.

We hooked it all up and I loaded the program and the backlight on the LCD blinked on briefly but nothing seemed to work. I double checked that the program was uploading correctly. We took a long look at all the wires connecting the display to the computer. And we finally concluded it had to be a bad solder joint somewhere. Dad went back and tried looking at all of his joints using an eye loop. When the opening “Hello World!” message didn’t appear, I didn’t bother trying pushing any of the buttons originally. While I was tinkering with something else, dad tried pushing one of the buttons and we realize that if you push the “Up” or “Down” buttons it would light up and display the text. But if you pushed any of the other buttons, the backlight turned off in the text disappeared. Again I concluded it had to be a bad liar somewhere and dad went back to his workbench inspecting his work yet again.

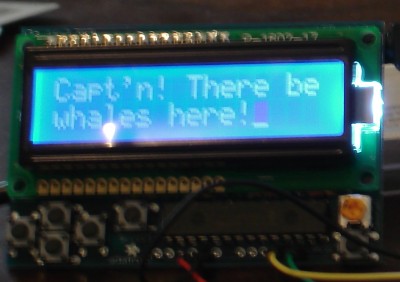
By now it was getting late in the evening. I wanted to watch the rest of the Pacer game and get caught up on the NASCAR race so we gave up for the evening. I shut down the computer, we went in the living room and I had my usual evening snack of milk and chocolate chip cookies while we watched NASCAR. I was just about to go the bed when all of a sudden I figured out what had gone wrong. Dad said “Let me guess it’s software isn’t it?” I humbly and somewhat shamefully answered “yes it is”. I finished up my snack, turn the computer back on, fixed the software, and got ready to upload it. Dad yelled in from the other room “I don’t hear any exclamations about whales in there.” I yelled back “there will be soon”. As a last step I edited out the “Hello world” text and put in “There be whales!”. It worked!

The problem was that the program was originally written for an LCD display with a multicolor backlight consisting of red, blue, green LEDs. The one that I had installed was only a single color backlight in so it only used one of the three backlight driving pins. The sample program was set up so that every time you pushed a button, the background color would change in addition to displaying the text corresponding to the various buttons. The background color that it tried to use for the opening message must use the red or green LEDs and I was connected to the pin for the blue LED. (Or some other combination). When you push the up or down buttons, they were displaying a color that works with my monochrome display. All I had to do was edit the program so that it always used full white background and that nature that my display always worked.

After editing the text so that it would display on 2 lines I replaced “Hello world” with this following more complete message.

Whales

I spent the rest of today reading programming manuals and learning how to use various built-in functions. The programming language is pretty much plain vanilla C/C++ but of course there are all sorts of libraries of code available to use various features of the device. I still got a small handful of parts in route from RadioShack before I can start working on the infrared emitter and detector portion of the circuit. Once I get those, I can start programming my customized remote control. Stay tuned for further updates.

My New Computer

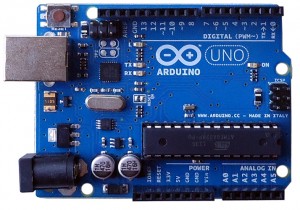
Here is a photo of my newest computer…

My New Computer

My New Computer

It’s called an Arduino Uno and it sells for $29.95. I purchased it from a company called http://www.adafruit.com/ However you can get it from a variety of distributors. It’s got 32 KB flash memory which is used to store programs, 2 KB SRAM memory that stores data that the program uses, 1 KB EEPROM memory which is sort of like a hard drive for storing data only as part of the chip and not really a disk drive. It runs at 16 MHz which for example is four times the speed of the first computer I ever owned.

Across the top of the little black thing is a set of 14 digital pins that you can do input or output from. The lower right corner has six pins that you can use analog output. It has a USB port that powers it and connected to your computer. You write programs in a special little language on your PC and tell it to transmit them to the device through the USB cable. It then does whatever you’ve programmed to do.

Experimenters Kit

Experimenters Kit

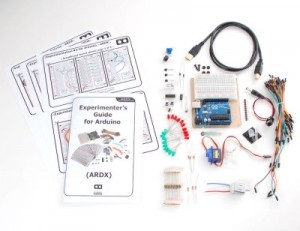
I went ahead and bought it as part of experimenters Kit that cost $85 which includes the $30 computer. It’s basically a bag of parts that say prototyping board, jumper wires, bunches of transistors, LEDs, resistors, switches, motors, temperature and pressure sensors etc. and a booklet that shows you what you can do with all of it.

So far I’ve made it blink an LED off and on at one second intervals. I’ve hooked up a pushbutton and it sends a signal to my computer telling me whether or not the button is pressed. And the coolest thing I’ve done with it so far is hooked up a little servomotor like the motors that my dad used in his radio controlled model airplanes to work the rudder and flaps. I programmed the computer to make the servomotor wiggle back-and-forth. I could connect up to nine of these motors and position each of them at any angle I want depending on how I programmed it. People use them to build home robots. For another $24 I bought an LCD text display with a LED backlight. It displays 16 characters by 2 lines of text. They have these displays with multicolored backlights but I got a simple white text on blue background version .

LCD Display Board

16x2 CharacterLCD Display Board

I’ve also ordered some infrared LEDs and infrared detectors. My plan is to turn the whole thing into a programmable custom TV remote control that I will be able to control multiple devices with only four or five pushbuttons. Currently I have a remote control in my bedroom that has a total of 14 buttons and of course I have to remember what each of those buttons do. This way I can cut it down to just some up, down, left, right, select buttons and it will display a mini menu on the character display and transmit it to my TV or cable box or whatever using the IR LED.

There’s 1 million different things you can do with one of these. There are websites all over the place describing different projects that people have built most of them homemade robots. I have to wonder if there’s some sort of a little board similar to this inside toys like “Tickle Me Elmo” that drive the whole thing. Hell with time and patience in a few extra servos I could build a Tickle Me Elmo using this thing.

I will probably eventually buy another one for $30 to be used permanently in whatever gadget that I build and then keep this one for tinkering with different projects.

Touch Panel Display

Touch Panel Display

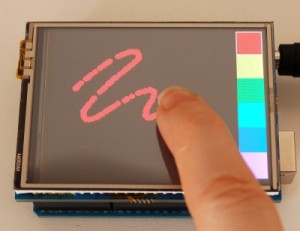
They’ve got all sorts of add-on circuit boards that will connect to a computer network, you can hook up a speaker and play music. They’ve got a voice synthesizer chip you can add. They even have a touchscreen display like this. It’s 2.8 inches diagonal and only costs $59.

Videogame Adapter

Videogame Adapter

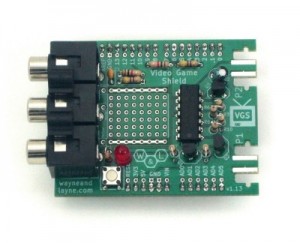
Another really cool add-on for $23 is a videogame interface. It’s a little board that you attach that has red/white/yellow video output jacks and two places to plug in Nintendo Wii controllers. Click here to see a video on YouTubethat shows a videogame created using this computer and the video add-on board.

There are 1 million different things you could do with this gadget. I can’t wait to try them all.

Computing Pioneer Alan M. Turing Honored with New Exhibit

Computing pioneer Alan M. Turing

This June marks the 100th anniversary of the birth of Alan M. Turing. Those of you who are not students of computing history may have never heard of Turing however if not for his work you wouldn’t be reading this article or doing anything with a computer. Turing was a British mathematician whose most famous accomplishment was breaking the German Enigma code during World War II. As an example of how important this code breaking was to the war effort, when he had broken the German naval code, sinking of British ships decreased by 72%.

If his code breaking efforts were his only accomplishments, he would be an important historical figure. But the fundamental principles underlying the computer you are using right now were created by Turing in the 1940s and 1950s.

A new exhibition celebrating the life of Turing was launched at Bletchley Park in Buckinghamshire, UK. During World War II, Turing was based at Bletchley and played a crucial role in cracking ciphers used to scramble German communications, including designing an electromechanical machine called the bombe, which partially automated the code-breaking. The exhibition covers Turing’s personal life and professional achievements, ranging from his school reports to academic papers where he set out his model for the universal machine.

Here is an article from TechRepublic with a slideshow of various items in the exhibit and explanations of his work depicted there. I also recommend the Wikipedia article on Turing which gives more details about his life.

In the world of computing, Turing is known for inventing something he called “The Universal Machine”. Basically this machine was the first description of what is now known as a stored program computer. Previously any computing machines such as calculators were engineered to solve only one problem. If you wanted to solve some other problem build a different machine. Turing envisioned this universal machine is having its program written in some coded form and stored in the memory of the computer along with the data which it was computing. All you have to do to make machine do something different was to change what was stored in its memory. The essentially load a different program into memory and the computer could do something completely different. That is the founding principal of all computers today. Even the little pocket calculator you may have is essentially a stored program computer. If you could take it apart, replace its program memory with a different program, it would do something completely different.

Turing was also interested in artificial intelligence. In an attempt to answer the question “Can computers think?” developed what came to be known as the Turing test. He suggested that you interview a human being and a computer via teletype machine or some other means of communication that the computer might be able to understand. If the interviewer could not discern which of the two subjects was a human being and which was a computer then you had come pretty damn close to having a machine that could “think”. The recent exhibition in which it IBM supercomputer named Watson competed against human opponents on the TV show Jeopardy was a kind of Turing test.

While Turing should’ve been a great hero in Britain during his own lifetime, sadly he was convicted of indecency because he admitted to homosexual relationship with a colleague in 1952. In those days really being homosexual in Great Britain was a crime. Various honors and awards which had been created to him for his efforts during the war were withdrawn. In June 1954 he was found dead of an apparent suicide.

In August 2009 British government issued official statements apologizing for the treatment of Turing. Numerous tributes including the Association for Computing Machinery annual Turing Award have been created in honor of him. The new exhibit described above is part of an overall celebration of the 100th anniversary of his birth.

I’ve often wondered if the “Turing test” was more than just about artificial intelligence and computing. Turing test was designed to test whether or not someone was “human”. If you couldn’t tell the difference between a questionable human and a “real human” than there really wasn’t any difference. I wonder if perhaps that test was really a metaphor for how he wanted to be treated in regard to his homosexuality. You have to wonder what further computer advances he might’ve developed had he not taken his own life at a relatively young age. And what accomplishments are lost to the world by people today and take the lives because the world judges them as failing Turing test.

Machines making machines! C-3PO’s worst fear realized

To quote C-3PO in Star Wars III “My Lord! Machines making machines!”

Here is an article from CNET.com that describes how engineers have made a tiny robotic bee by sandwiching together 18 layers of different materials, cutting them out with lasers, pushing a little pin into them to make them fold themselves into position, dipping them into solder to glue everything together, and then cutting them loose from their base using a laser. The end is a little self assembling machine that when you apply voltage to it, it flaps its wings.

Here is the article from CNET.com

or here is a YouTube video from the article explaining in more detail.