In the ATMakers.org Facebook page we’ve been discussing the development of an assistive technology device we are preliminarily calling APHID. It’s my belief that at least one version of our APHID device will need some sort of display. Here is a proof of concept of the device using a feather 32u4, OLED display and three switches. It does every kind of mouse control that you could imagine as well as the limited keyboard commands. This device is connected through USB but we could also make a Bluetooth version.
Monthly Archives: April 2017
3D Printed Easter Eggs
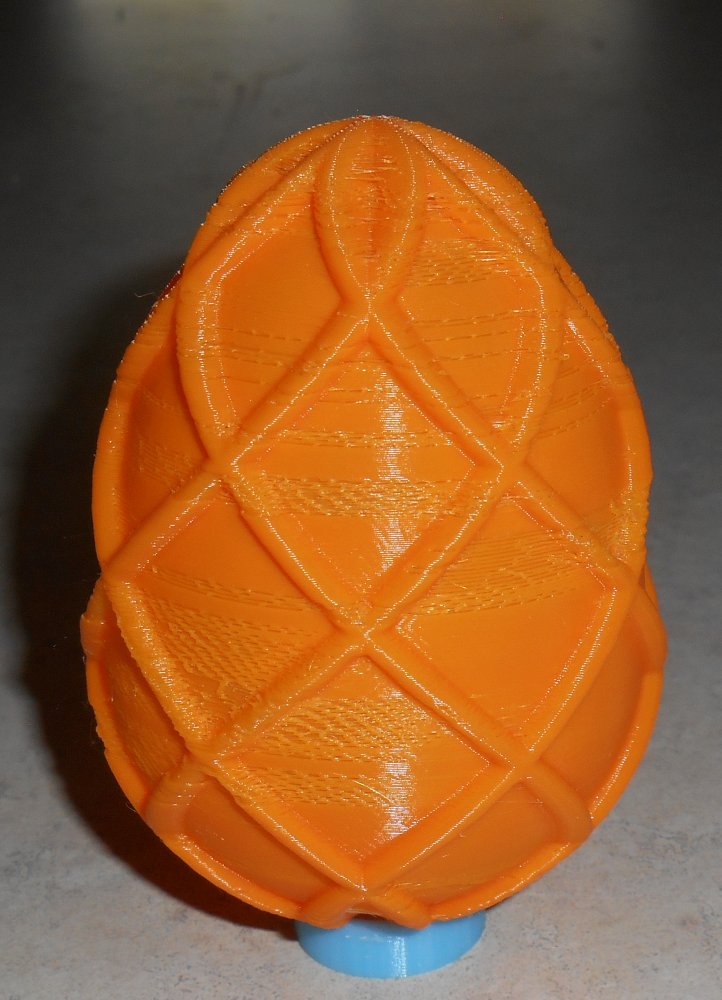
Last Christmas I made some 3D printed Christmas ornaments so when Easter rolled around this year I decided I would try my hand at designing some 3D printed Easter eggs. Here are the results…
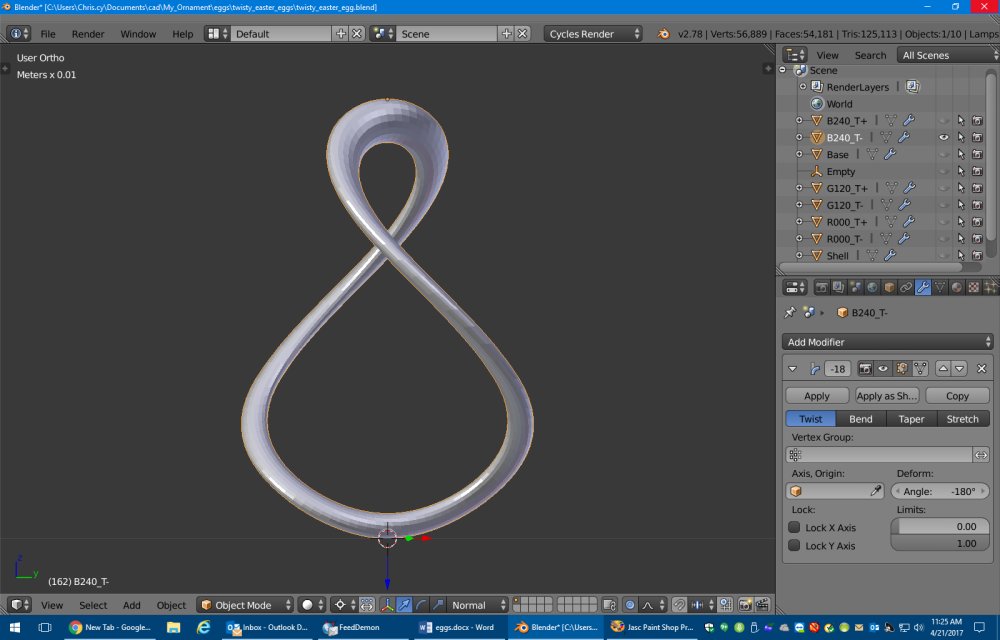
Just like my twisted spear and twisted tree ornaments from Christmas, this one consists of basic shapes given a twist and multiplied at different angles. For the egg I started out with a simple doughnut shape called a torus, selected the top half and scaled that by 1.75 in the vertical to make a basic egg shape.
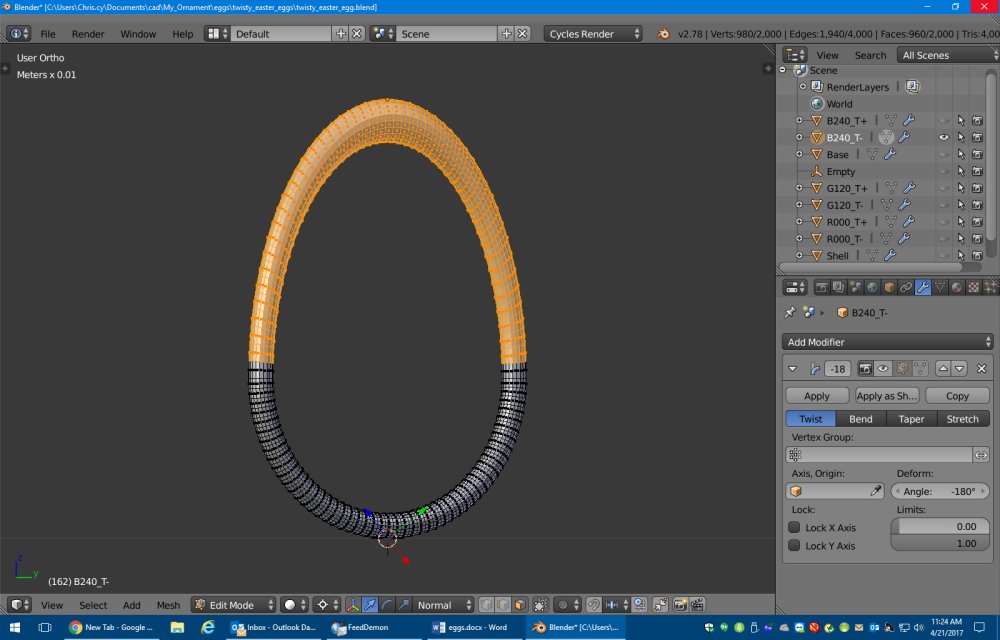 en twisted the shape 180° like this.
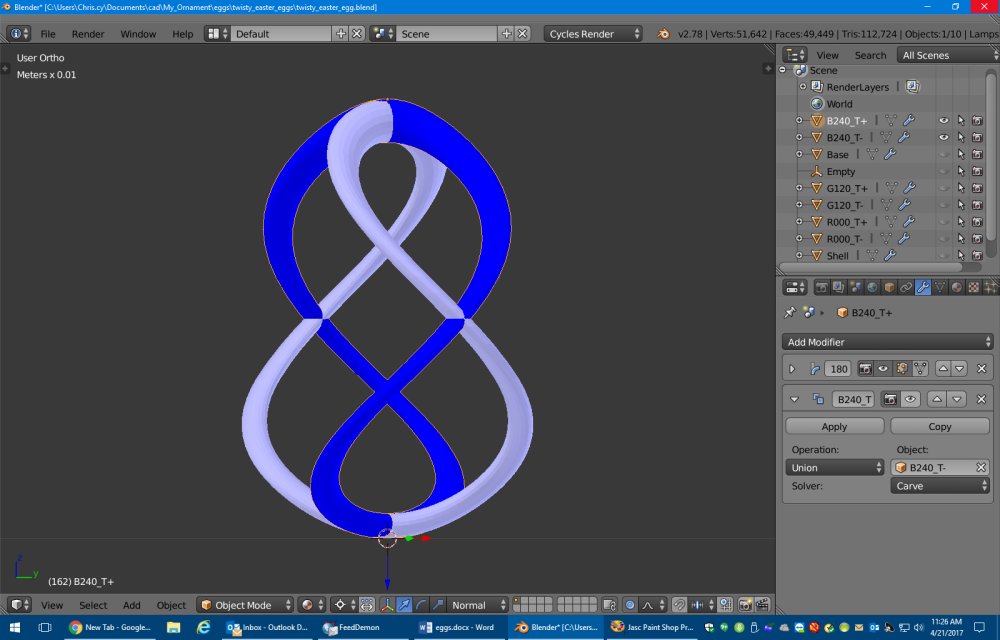
I then made another copy and twisted it 180° the opposite direction. Here I have color-coded each piece light blue and dark so you can see which is which.
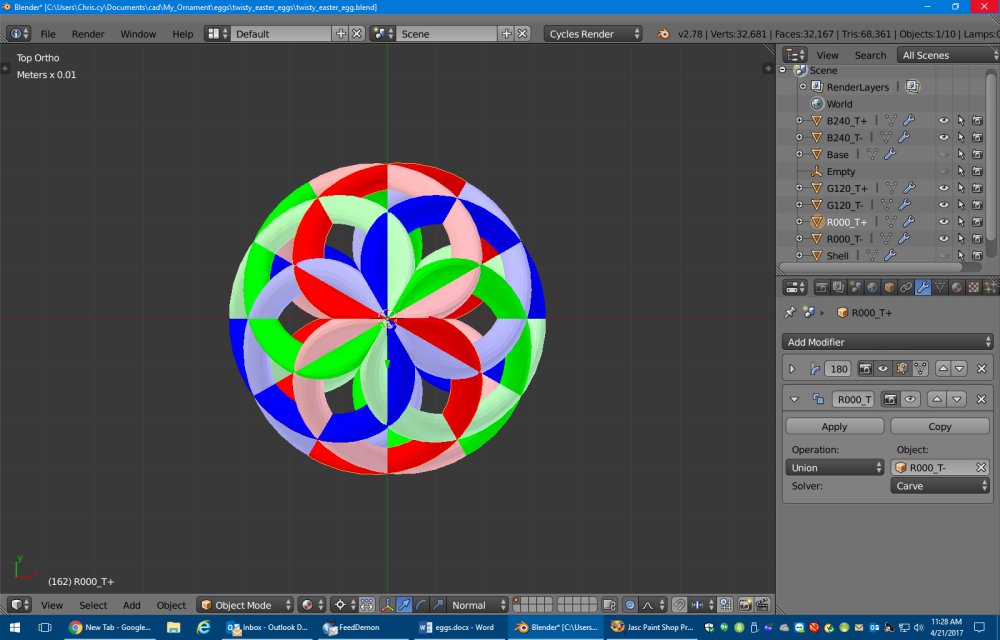
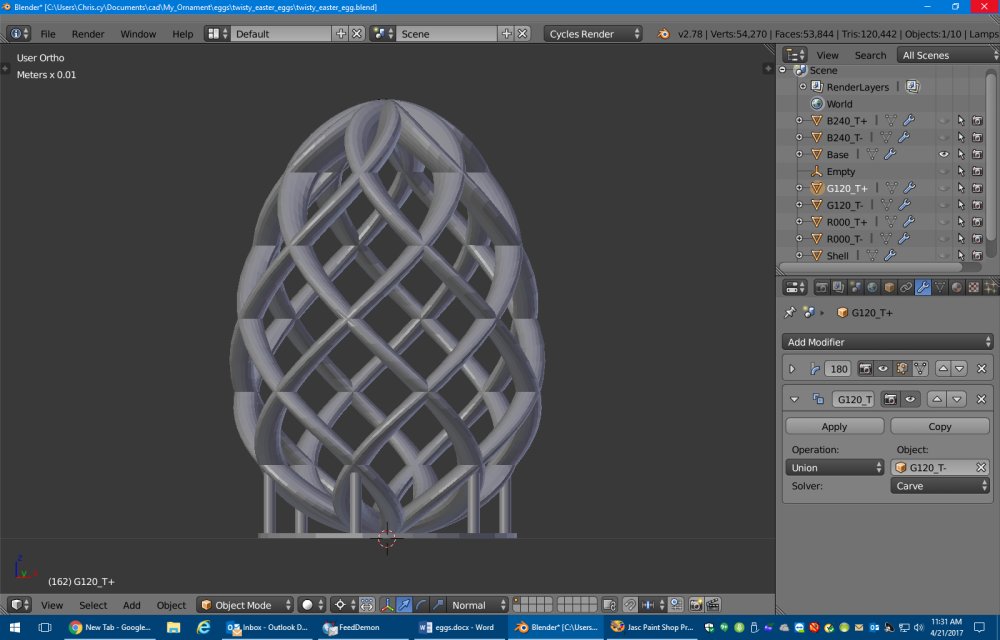
I then made two more copies and rotated them 120° and 240° respectively so that we have a total of six twisted tori. I’ve color-coded all of these as well. There is both a front view at a top view.
l started wobbling as it printed and I ended up stopping the print because it was just coming out too nasty. I also had lots of problems with threads. Here’s a photo of my first failed print sitting up on a little podium I built.
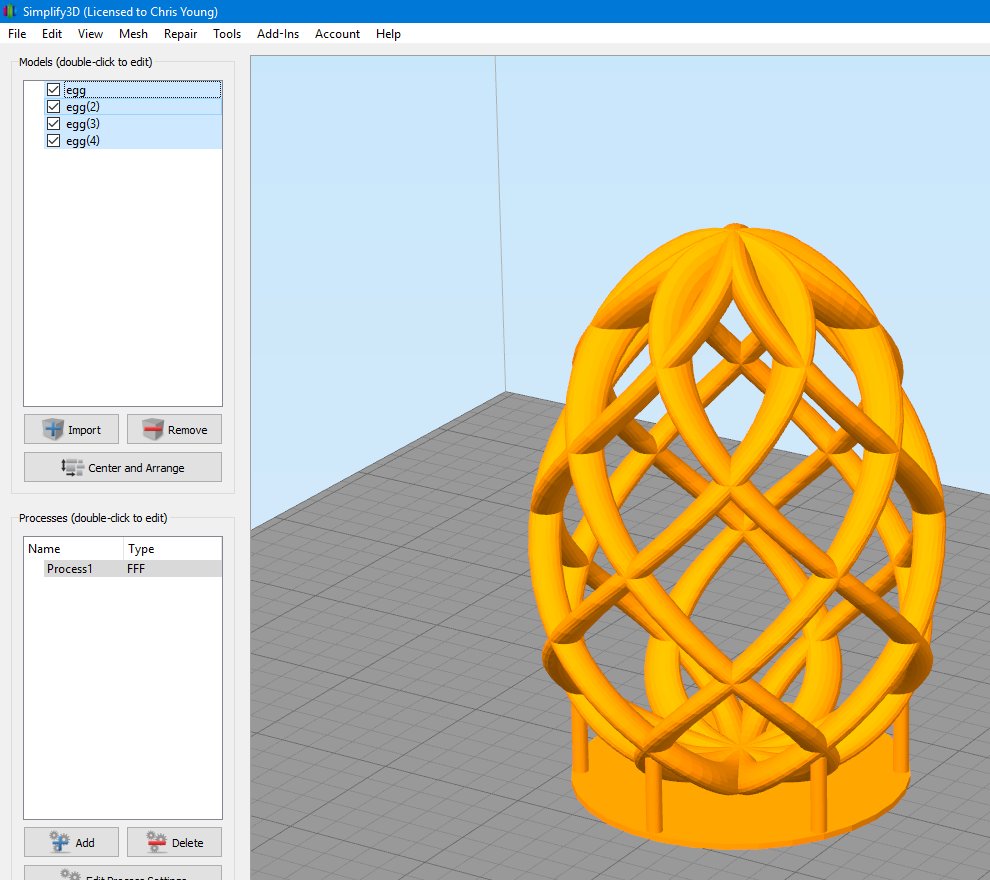
I tried putting supports under it but the automatic support system in Simplify 3D was also creating supports inside the egg which I didn’t want. And I couldn’t get the manually placed supports where I wanted them. I decided to just go back to the CAD program and model supports exactly the way I wanted them and then not use supports in the slicer. I added a base disc and six pillars. These pillars were not necessarily traditional supports to make overhangs print easier. Instead they were just to steady the model while it printed. By the way I was printing with 2 shells and no infill also with 4 top and 4 bottom layers. The base is 1 mm thick. The 6 supports were 2.5 mm in diameter.
Initially I was still printing with the point down and here is the results.
As you can see I was getting very bad threading. I also didn’t like the look of the model with the pointed end down and that’s when I turned things upside down and put the pointy end at the top to emphasize the egg shape. I also needed to try to reduce the threading somehow to get a cleaner print. I tried increasing the filament retraction and the Z lift but it didn’t help much. I finally decided to turn down the heat from 210°C down to 200°C. I made this change mid-print while printing this blue version. You can see the threading is still bad at the bottom but after I reduced the temperature it was still present but much less so. I didn’t want to experiment further by reducing the temperature so I let it finish at 200°C.
I also tried filling in the gaps in printing a solid shell. Again I started with a sphere shape, selected the top half, and scaled it appropriately. Here is the result.
All of this was modeled in Blender 3D which isn’t really designed to be a modeler for 3D printing. It’s more for rendering and animation but it does allow export to STL format. I’ve been using it because I didn’t want to learn multiple CAD programs and I was under the impression that Autodesk Fusion 360 would only allow you to use it for three years for free and then you had to register it at a very expensive subscription price. I’ve only recently learned that you can continue to renew your free license for enthusiast or student use without having to pay for subscriptions. Only commercial use for companies earning over $100,000 per year requires a paid subscription. I’m not quite sure how you would model this particular object using Fusion 360 but I haven’t had time to play with it yet.
Unfortunately Blender 3D has lots of problems when it comes to Boolean operations on objects or what we used to call in POV-Ray CSG for “constructive solid geometry”. It’s a process of taking multiple pieces and either merging or intersecting them. Although there have been some recent improvements in CSG operations on Blender 3D, it still struggles to merge or union objects that have coincident surfaces. Sometimes you can fudge one object or another by 1/10 of a millimeter and get it to work but it is very finicky.
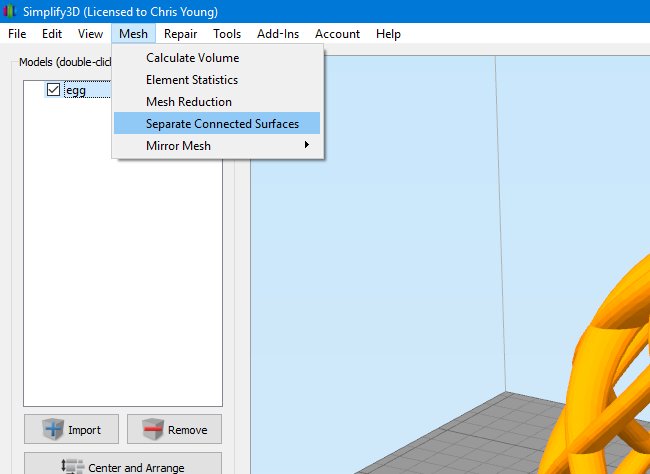
All of the prints shown here were done without merging the objects. I exported them as a single model with multiple parts. I used an option in Simplify 3D by clicking on “Mesh->Separate Connected Surfaces”.
This in effect takes the multiple pieces and merges then in the slicer. There were still some issues with non-manifold parts of the model but I didn’t realize that until after I had printed them. After much tinkering using different options in Blender 3D and fudging the pieces back and forth I was able to get Blender 3D to create a single solid model. Those corrected models are the ones I’ve uploaded to Thingiverse however I have to admit I’ve not actually printed the versions I’ve uploaded. I’m still confident that not only will they print, they should print better than one’s that I actually printed myself.
I demonstrated this project on the Adafruit Show-and-Tell weekly video chat. Click on the icon on the right to see that video.
You can get the original Blender files, some intermediate blender files I used in creating the merged versions, and completed STL files that should print reasonably well. I recommend printing with 2 shells, no infill, and no supports. If you get threading, try turning down your heat. You’re still going to need to do some cleanup on the non-solid version. Threading is always going to be a problem with a print like this.
If you want to export from Blender 3D you can use the file “twisty_easter_egg_merged_2.blend”. If you select the object “Base” it will print the hollow version. If you select the object “Shell” it will print the solid version. The file “twisty_easter_ege.blend” is the original model before I tweaked and merged all the pieces. You can look at it to see how the original design was created.
You can get the files here on Thingiverse. Enjoy!
How I Sleep Better Thanks to My New IPad
I’ve already chronicled the story of my month-long stay in the hospital last December which resulted in getting a trach and being on a ventilator. The worst part of the experience is that I am not be able to talk while on the vent. Fortunately I only need to be on the ventilator now at night to help me sleep. However the communications issues are still a problem. It’s common for me to need to call my dad in the middle of the night to rollover or to suction out the trach.
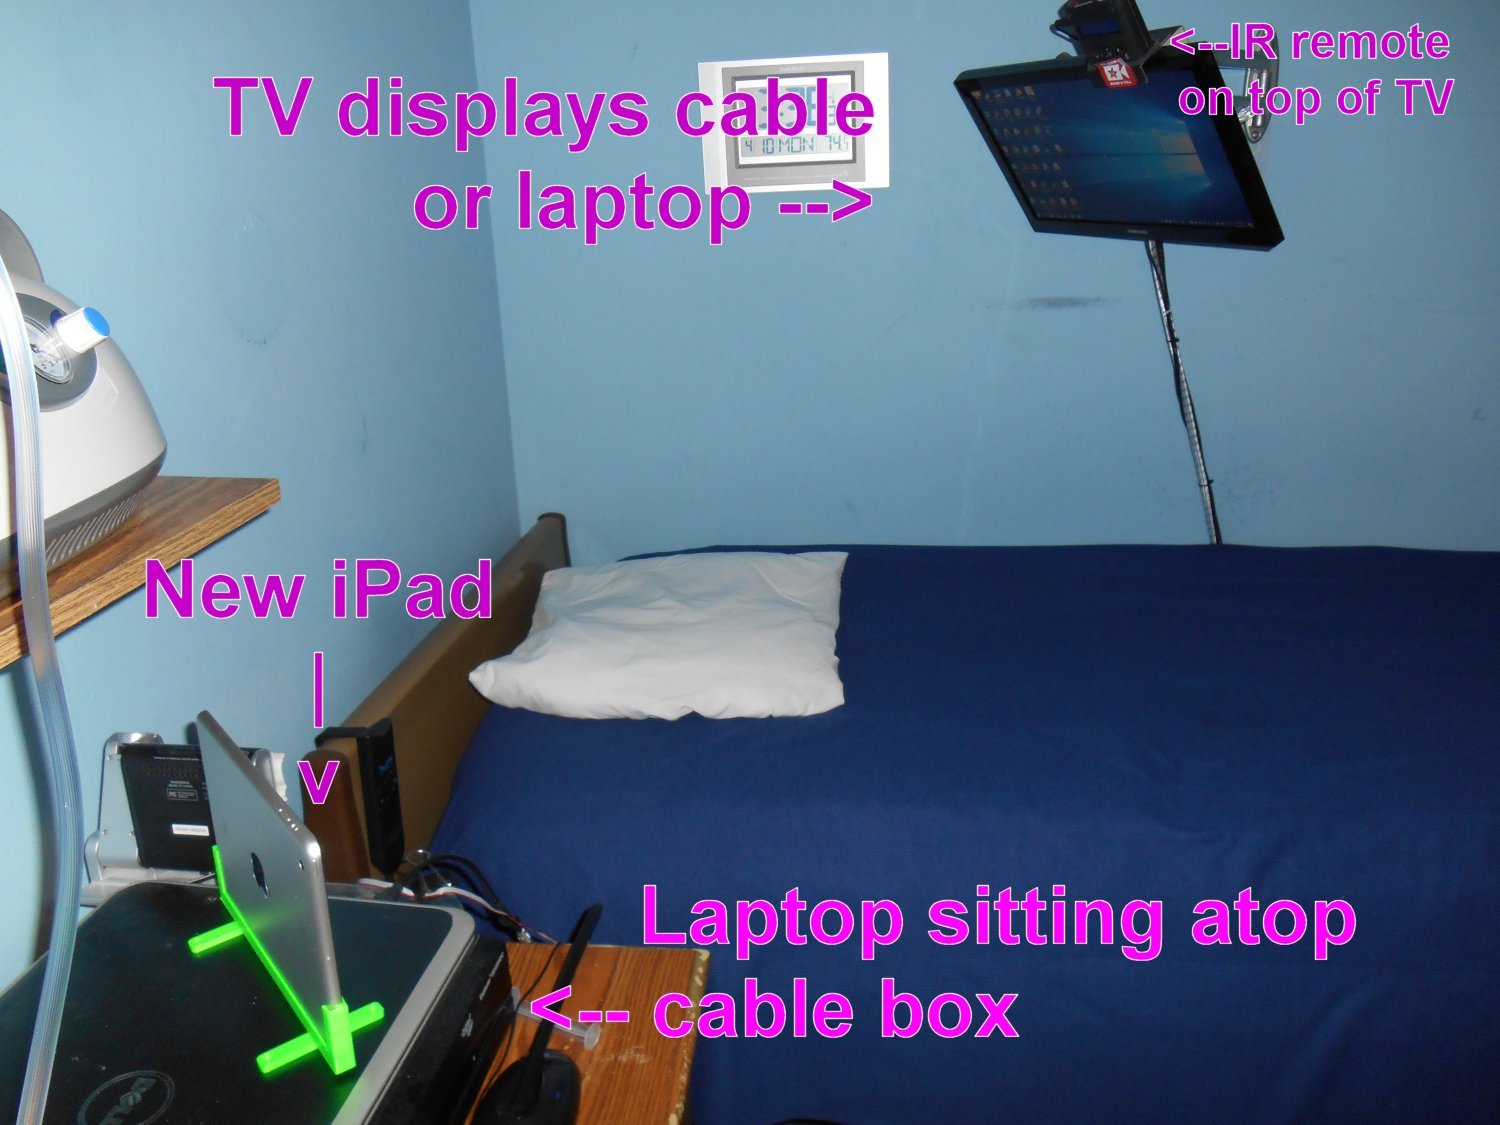
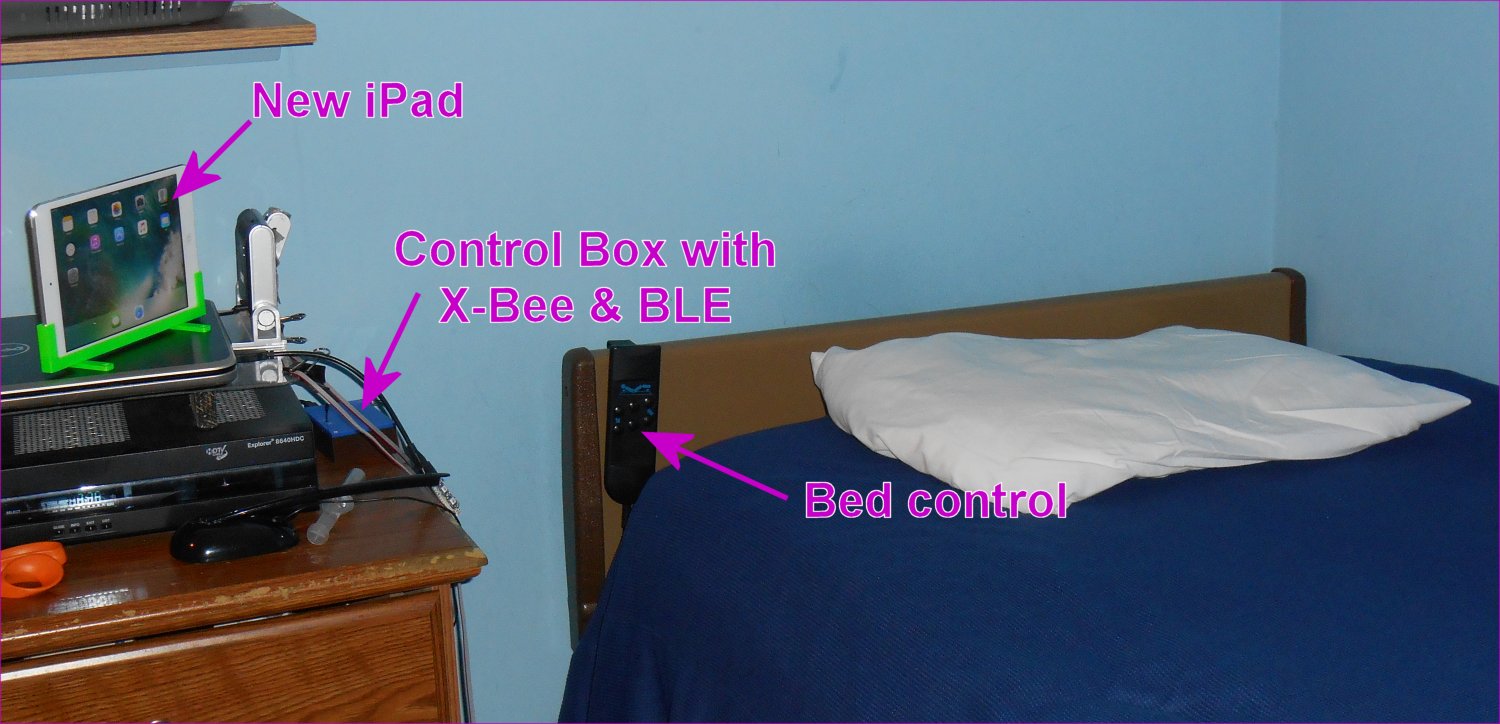
My main means of communication with my dad while on the vent consists of messages I type on my laptop. My laptop sits on my dresser next to me on top of my cable box. A long HDMI cable runs from the laptop around the back of my bed and up to the TV hanging on the wall over my bed as can be seen in this image.
You can click on any of these images for larger versions. There is also an HDMI cable from the TV to the cable box. By switching inputs on the TV, I can either watch cable TV or use the laptop. Normally computer control on my desktop or laptop is via dictation software Dragon NaturallySpeaking but of course if I’m on the ventilator I cannot talk to use the computer. However I have an infrared remote control that not only controls the cable box and TV but it provides mouse control and some keyboard controls for the laptop (mostly arrow keys). The IR control is in the black box sitting on top of the TV.
When I get on the ventilator at about 11 PM each night, I call up a notepad window on the laptop and use the Windows on-screen keyboard. I have it set up in scanning mode and use a single switch on my IR remote to type on the keyboard. I have a couple of files of text with standard messages but then I can type anything I want as well.
The system has worked very well ever since I got out of the hospital late last December but I’m finding it’s uncomfortable to lie on my back all night long. Typically I wake up somewhere between 5 AM and 8 AM and need my vent suctioned. At that point I’m more comfortable if I rollover on my right side.
The problem with lying on my side is that I can’t see the TV monitor to see what I’m typing on the laptop. Also there is a small black box on top of the TV that is my IR remote control. It has a 2×16 character LCD display that I need to see in order to operate the IR remote. I cannot see it lying on my side either.
That meant that if I needed to communicate with my dad while on my side we had to play 20 questions. I can signal yes or no with my facial expressions. If that didn’t work he had to take me off the ventilator and insert my talking valve. I needed some sort of device that both he and I could see while lying on my side.
When I was in the hospital I used Bluetooth switch control to type messages on my iPhone to communicate with doctors, nurses, and family. However the iPhone screen is pretty small so I decided I would buy an iPad. I settled on an iPad mini 2. As you can see in the image it sits on top of my laptop and cable box. I could’ve opened the lid on the laptop but it was sitting at an angle that would make it difficult for me to see. The iPad is a better choice. Also if I’m ever in the hospital again I will use it instead of the iPhone because it has a bigger screen.
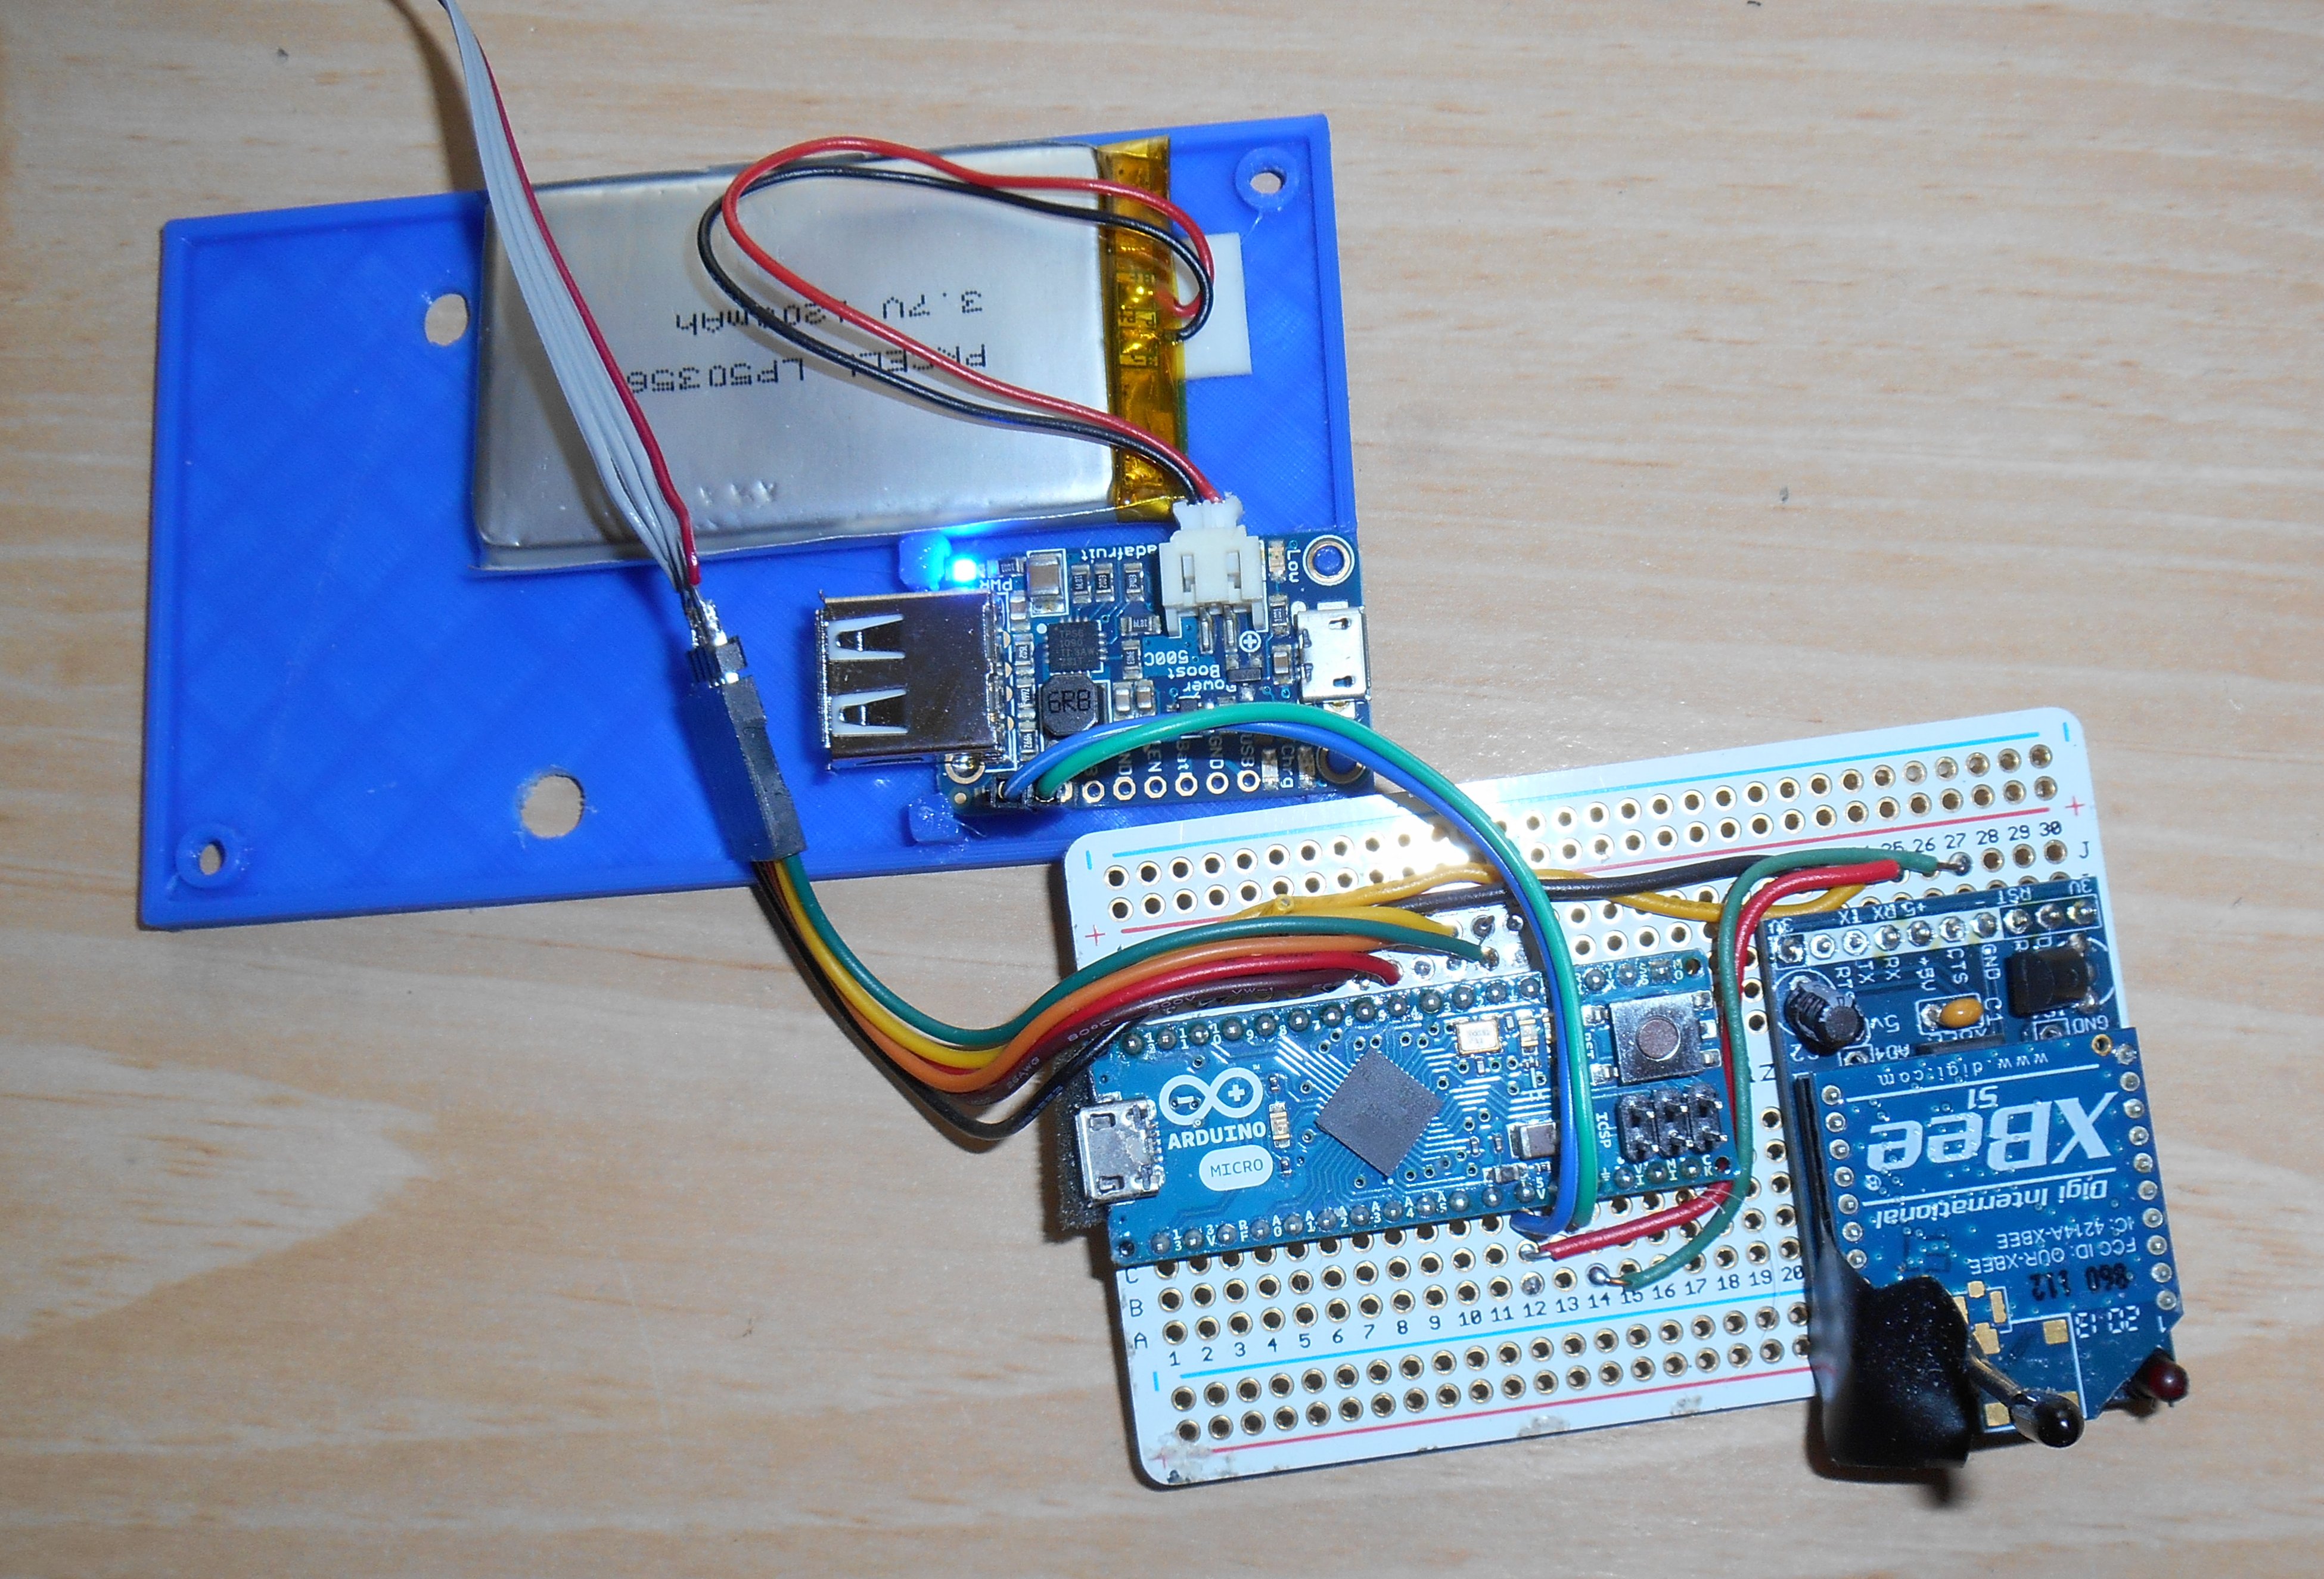
My IR remote sits on top of the TV as shown in the first image above. I control through a control box that sits on the dresser next to the cable box. The two are connected using an X-Bee radio. In addition to sending RF signals to the IR remote, it also sends RF signals to a similar device in my dad’s bedroom so that I can push a certain set of buttons and it sets off the alarm to wake him up to tell him I need something. This image shows the interior of that control box on the dresser. It consists of an Arduino Micro, X-Bee radio, Adafruit Power Boost 500C and a Lipo battery. The battery is a backup in case of a power failure.
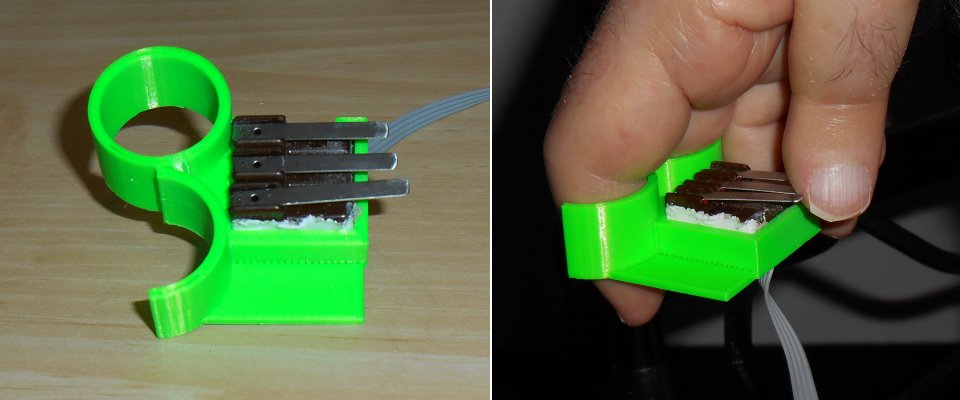
Connected to that box are three micro switches mounted in a 3D printed plastic ring that helps me hold the buttons in my hand.
My friend Yahnatan refers to it as my Dr. Strange Sling Ring. It really made me mad when he called it that. I’m not offended. I’m mad that I didn’t think of it first! In order to control the iPad I would need to add Bluetooth of some kind to the X-Bee/Arduino device. I decided to use the Adafruit BLE SPI Friend.
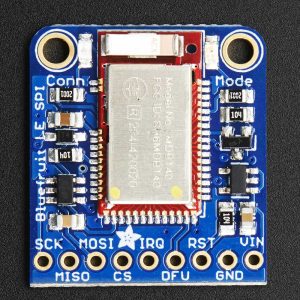 If I was designing the system from scratch I would have used an Adafruit Feather 32u4 BLE with one of their RF feather wings but those didn’t exist when I first built this project. I’ve got everything already designed around a 5 V device and the X-Bee RF system. I also didn’t plan ahead thinking that I would someday need to attach an SPI device like the BLE Friend. Unfortunately I had already used the dedicated SPI pins on the Arduino Micro for other purposes. Fortunately the Adafruit Bluefruit software library has an option for software SPI. It will allow me to use any set of six pins to connect the device. I was pleasantly surprised that that feature worked right out of the box.
I have the software configured so that if you press all three buttons simultaneously for more than one second it toggles between IR mode and Bluetooth mode.
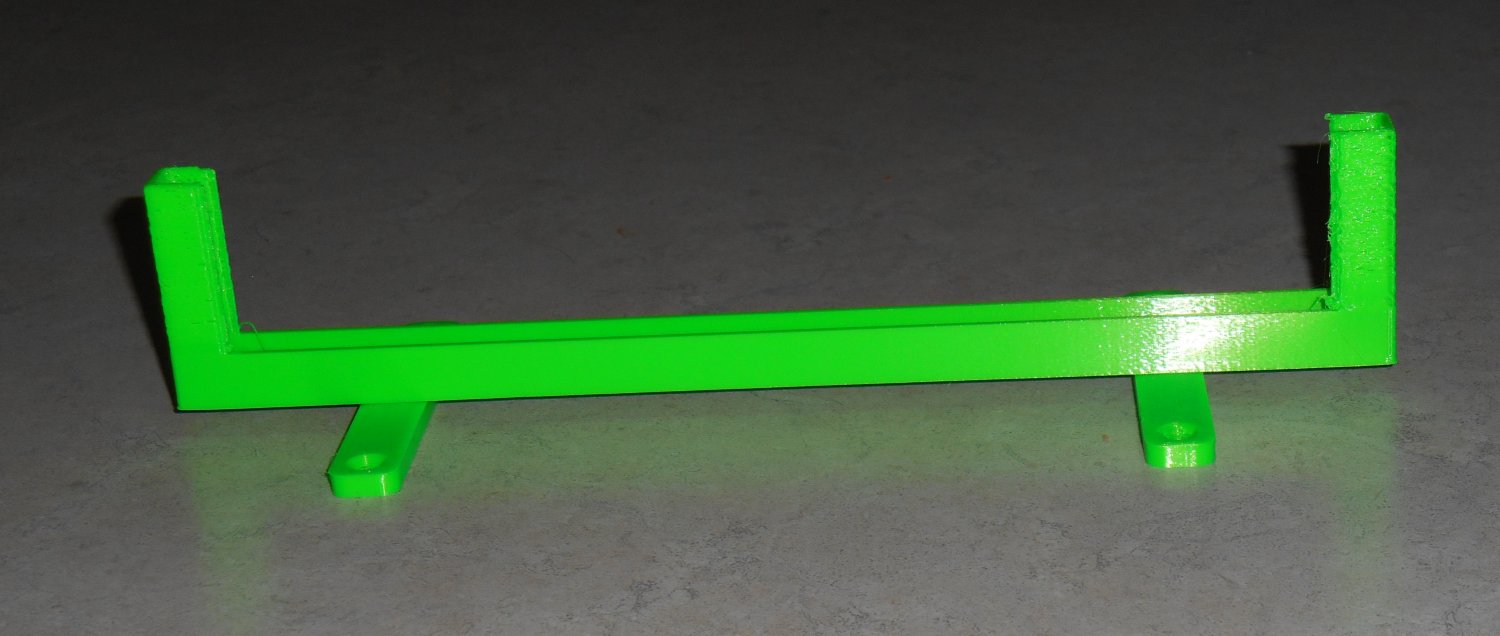
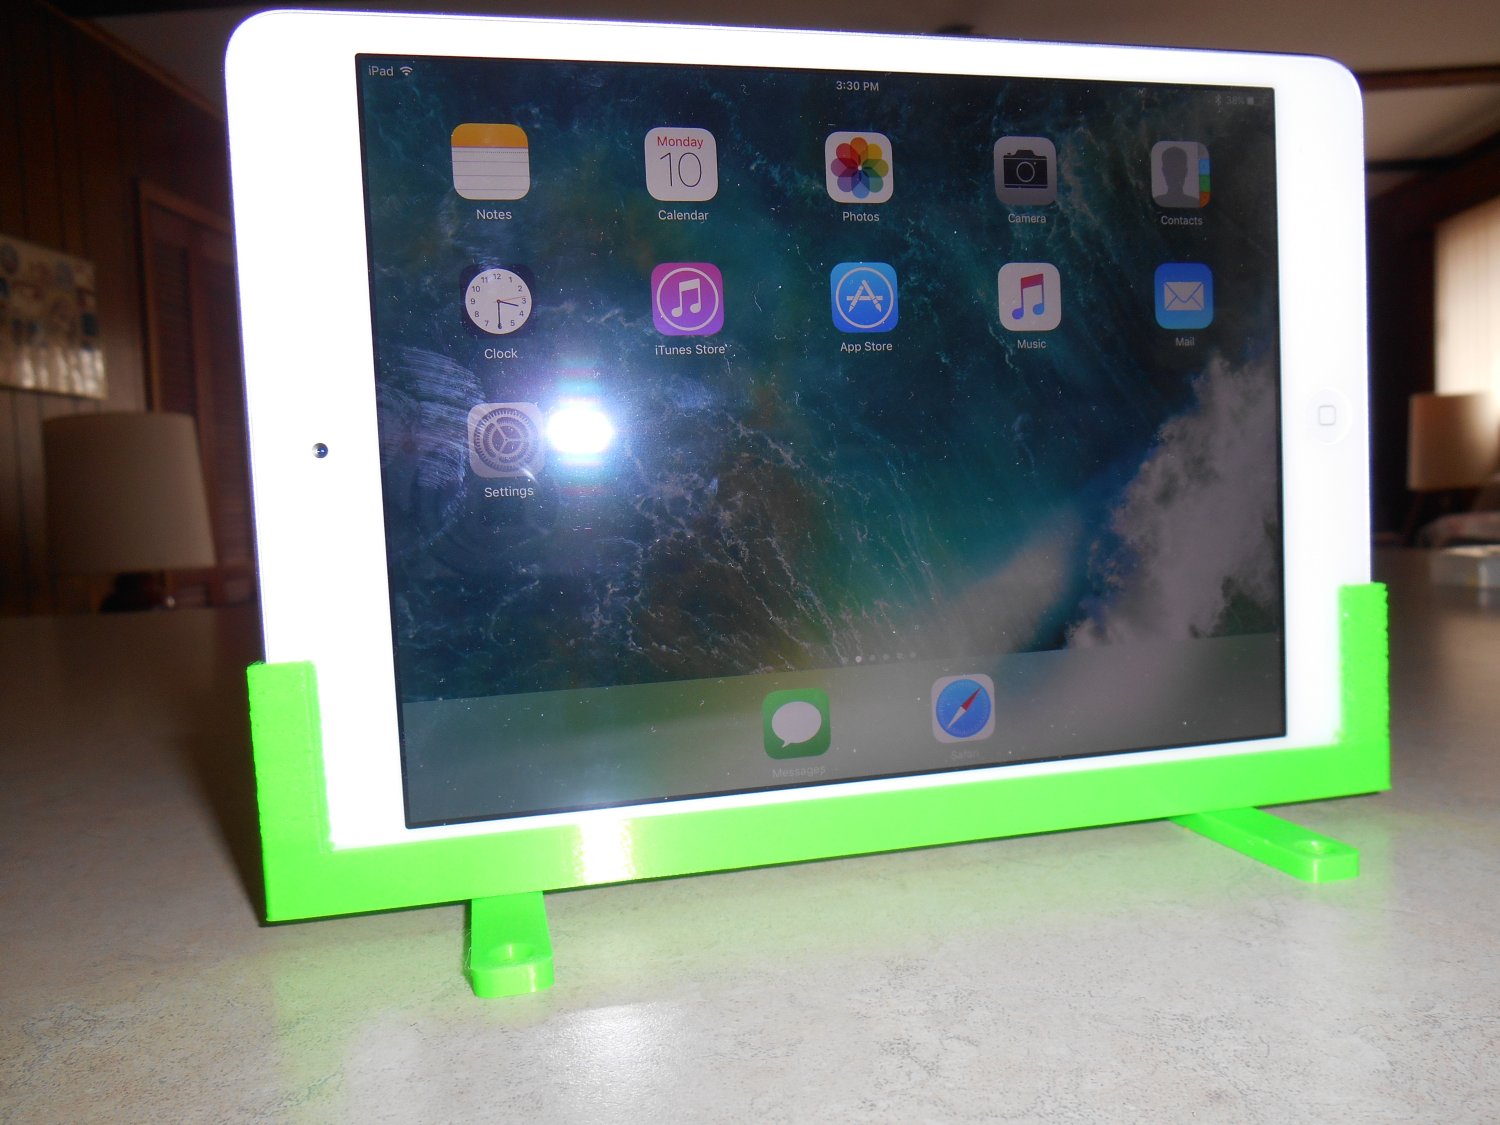
The only remaining task was to make a 3D printed stand for the iPad. I wanted something that would hold it perfectly straight up and down 90°. It had to be stabl enough that it wouldn’t knock over to easily but I wanted to be able to fold it up so it would lie flat for transport when not in use. Should I ever end up in the hospital again I would be using this iPad rather than the iPhone to communicate with doctors and nurses.
The photos below show my 3D printed stand. The legs are not solidly printed on the long beam. They are attached with 4-40 machine screws so that they can pivot 90°.
I’m still a little bit concerned that it may be unstable. I tried to make 3D printed suction cups using Ninja Flex however the rim of the cups was not smooth enough to make an airtight seal. I ended up buying some suction cups from Amazon but they have not arrived yet. I’m not sure if I’m going to install them or not.
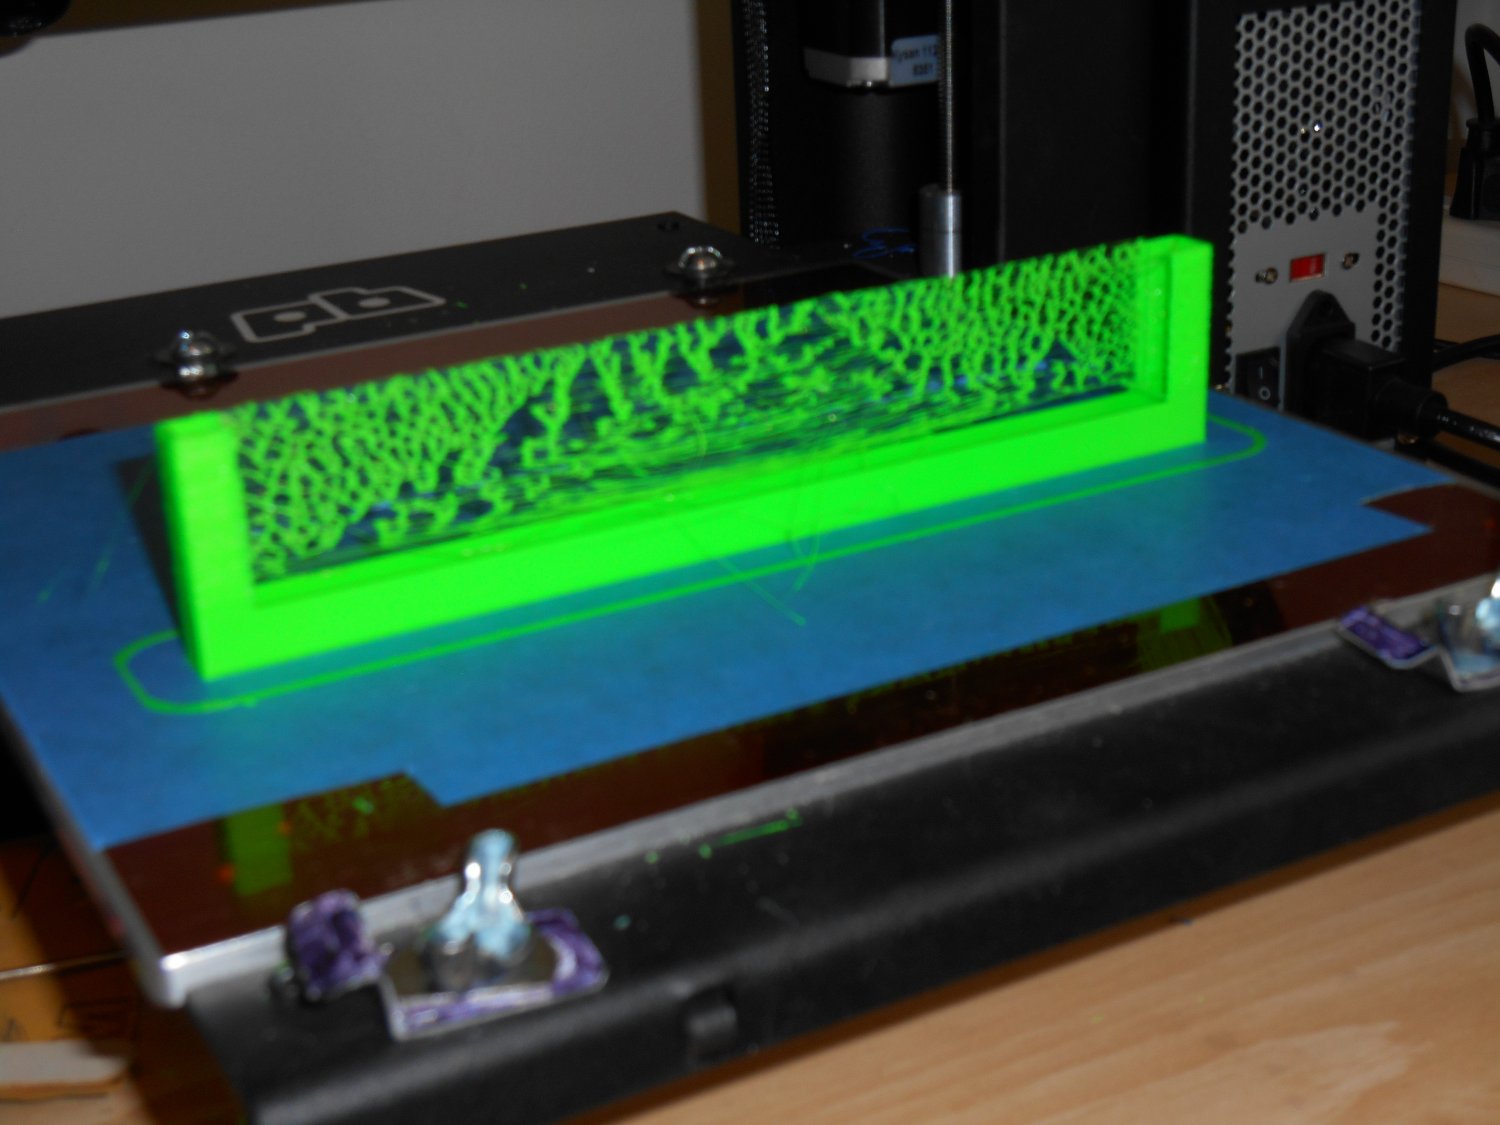
One other item to share… I must’ve been using some really cheap PLA plastic that was very stringy because as the stand was being printed there was an unusual amount of threads connecting the two uprights. The end result looked like some sort of weird tennis net. I’ve never seen threading this bad. Of course it was easily broken off and removed but I thought it was so bizarre I had to share it.
I been using the device for a couple of weeks now and it works really well. It allows me to not hesitate to roll over on my side where I can sleep more comfortably and know that if I need to communicate with my dad I can do so easily.
I talked about this project on the weekly Adafruit Show-And-Tell video chat. You can see that video by clicking on the icon on the right.
Demonstrating New iOS 10 Switch Control Features
There are several new features for accessibility switch control in iOS 10 that I thought I would demonstrate. One is an easier way to rearrange icons on your desktop. The other is a way to control multiple iOS devices using one Bluetooth switch device. Suppose you have an iPhone and an iPad and you want to use the same accessibility switches to control either one. In the past you would have to unpair one of them and pair the other one. This had to be done manually and could not be done by switch control. However if both devices are connected to the same Wi-Fi you can control one through the other completely under switch control. Here are the videos.

