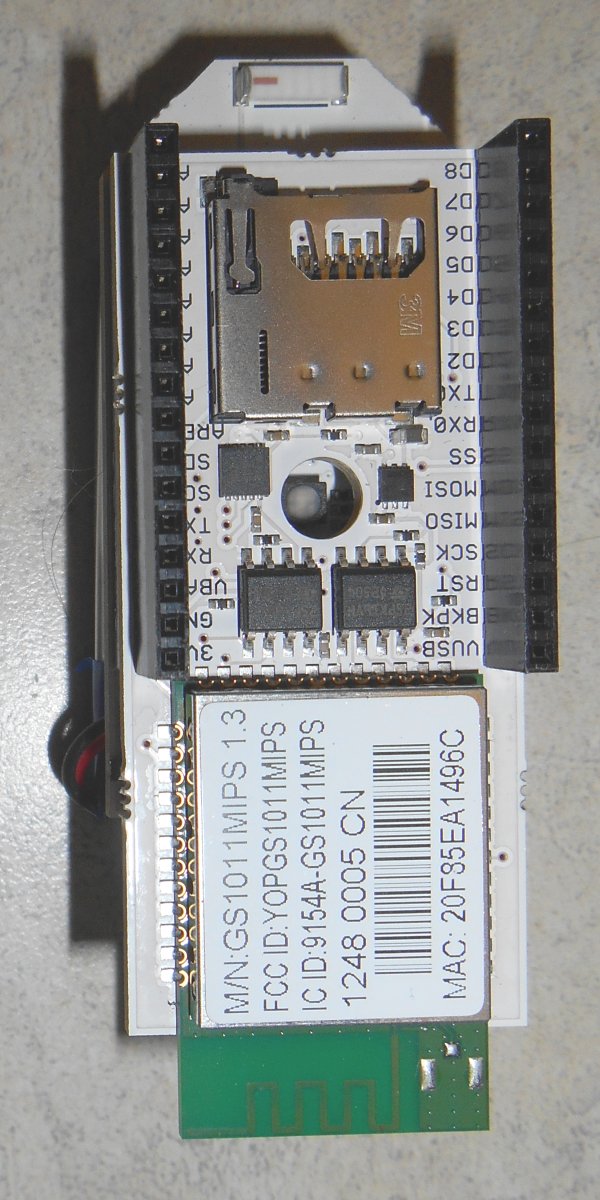
Pinoccio Wi-Fi Development Board
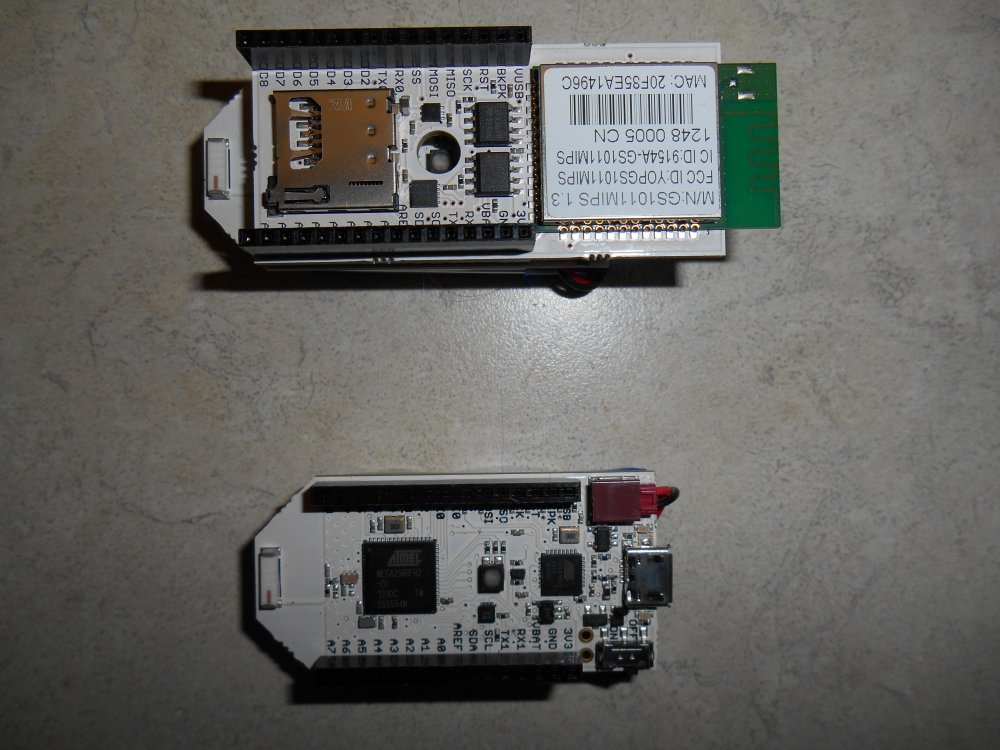
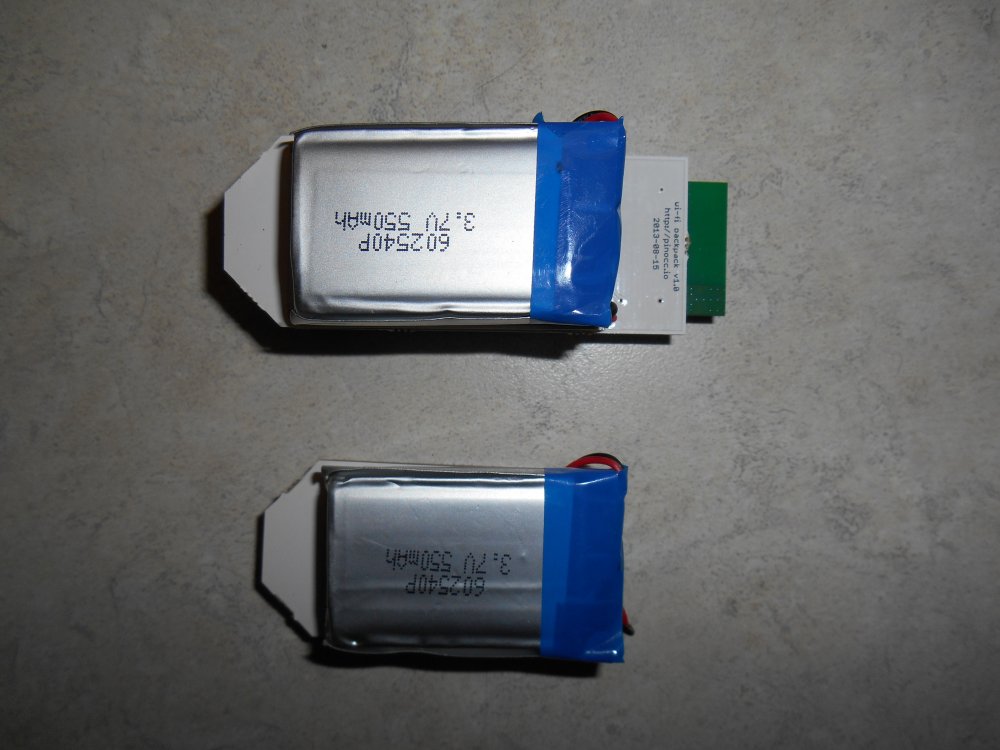
Here’s a bit of history… In late 2012 or early 2013 I became aware of this Indiegogo campaign titled “Pinoccio – A Complete Ecosystem Building of the Internet of Things” It was a small 1″ x 2″ Arduino compatible board using a chip similar to the one used by the Arduino Mega. This variety had a built in mesh radio such as used by the X-Bee system. It had a built-in LiPo battery, an RGB LED, a temperature sensor and a Wi-Fi backpack. You could connect to one of the units called a Lead Scout via Wi-Fi and then it would communicate to the other units over mesh radio which were known as Field Scouts. I quickly signed up at the $149 support level which would get me a Lead Scout and a Field Scout. Although the units were a bit pricey, if you added up what it would cost to buy an Arduino Mega, battery, charger circuit, X-Bee radio, and Wi-Fi module it seemed like a bargain at the time. They were seeking $60,000 in funding and end up raising over $105,000. Put this in proper context note that this was several months before Spark Core appeared on Kickstarter. Note that Spark Core has recently rebranded as Particle.io.
Had Pinoccio made its original delivery date of July 2013 they would’ve beaten everyone to market and would’ve been a major player in the Internet of Things movement. There were plans for a smaller version without the battery and sensors that would’ve been easier to embed into production products. There were plans for a variety of backpacks or shields including the one I was most anxious to see… infrared LED and receiver. My goal was to use it to create an Internet capable IR remote. I wanted to create an inexpensive alternative to the RedEye IR Remote from ThinkFlood. And it was a good thing I was planning such because ThinkFlood was shutting down as seen here.
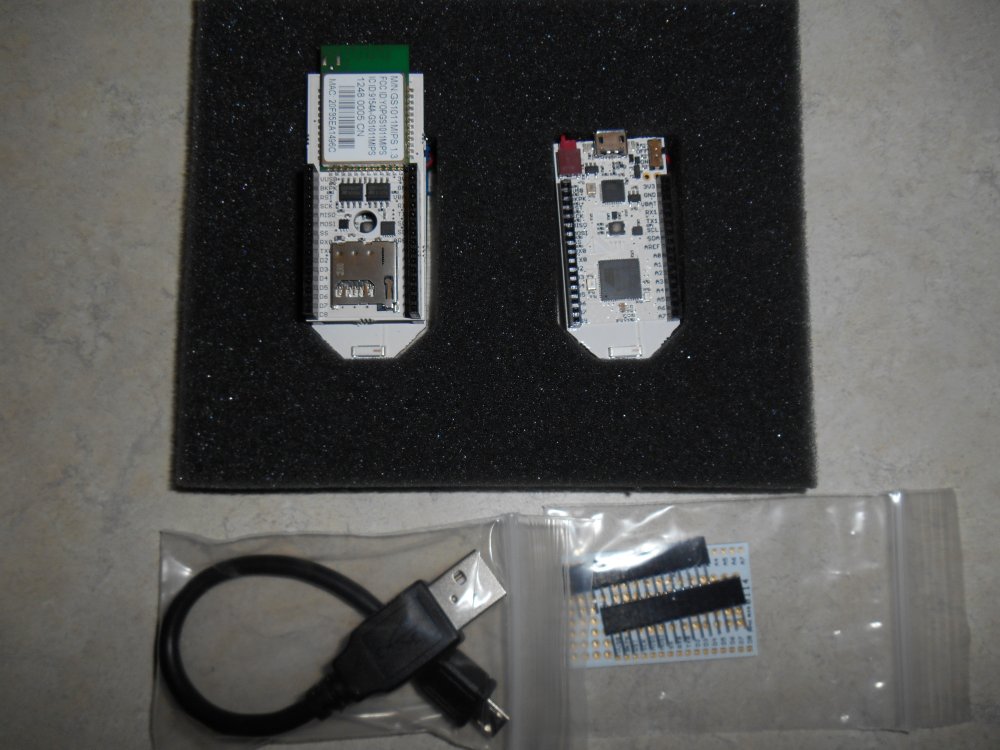
My Pinoccho boards upon arrival.
The folks from Pinoccio quickly learned the hard lessons of crowd sourced funding. Lesson number one is inevitably “If you’ve got a great idea it’s easier to raise money then it is to bring a product to market.” I won’t bother to recount the litany of things that caused multiple delays but the bottom line is that backers did not get their units until April 2014 a full 10 months past the initial estimated delivery. The reasons were the usual things: finding suppliers, finding someone to make the boards, setting up the business itself. It seemed that the main reason/excuse for delays was that “We want to get the software right.” Here is my blog post which gave my initial positive reaction to the devices when they finally arrived.
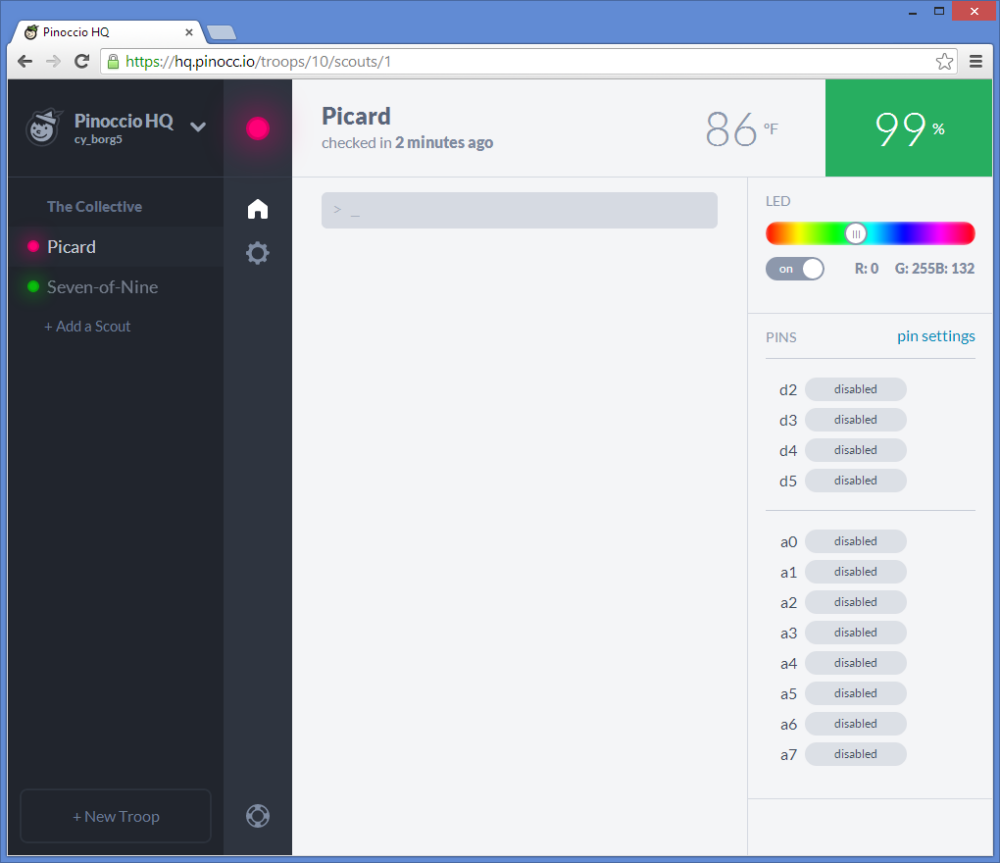
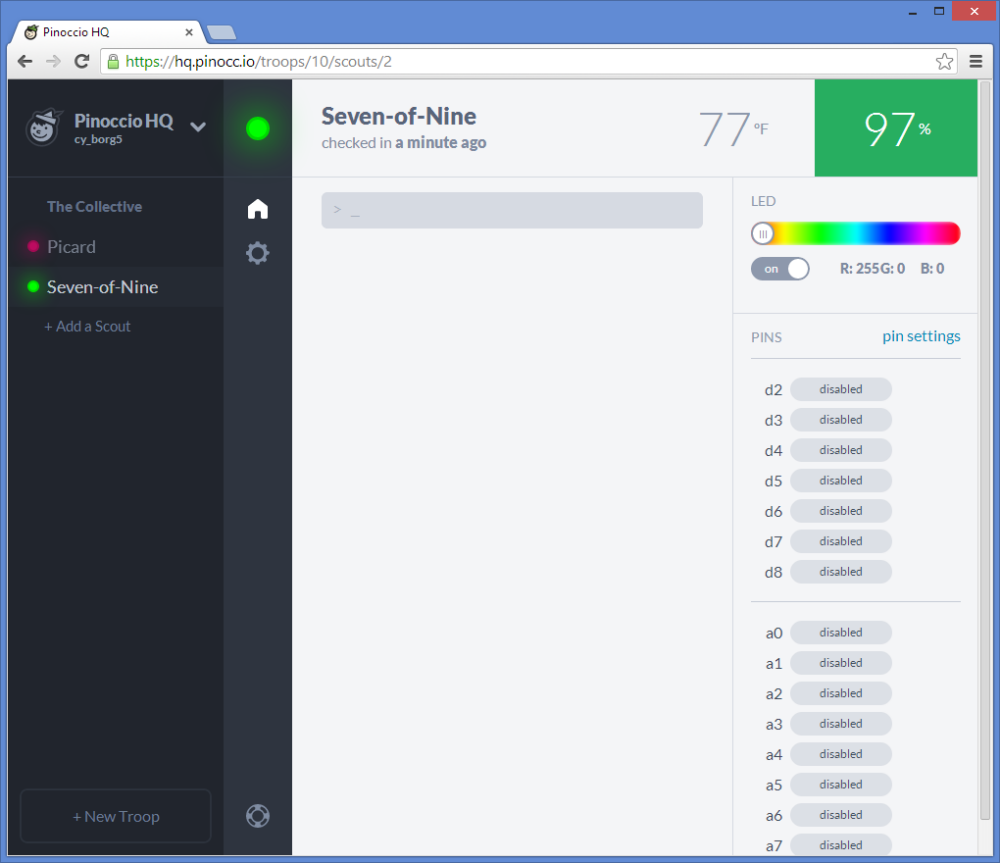
The software that we waited so long to finally get was indeed quite extensive. There was an Internet portal called hq.pinocc.io that allowed you to do many things without even writing any code. And it included an extensive script language that you could write small programs directly from the HQ application without having to use the Arduino IDE or do any C++ coding. They wanted you to be able to plug the thing in and do something with it right away. That ability is one of the key things that led to the success of the original Arduino. With a built in RGB LED and temperature sensor, you could do more than just blank the LED on pin 13 like you can with Arduino out-of-the-box.
However if you wanted to write your own applications, the learning curve at least for me was very steep. I had no experience in connecting devices to the web. I did know quite a bit of JavaScript programming, CSS, and DOM HTML programming which was useful. I had a little bit of experience with PHP however that did not apply in this case. What I did not have any idea how to do what is called “asynchronous communication” with Web servers.
I was taught as a programmer from day one that execution of a program started at the top of the main module and went step-by-step through the module sequentially unless modified by the if/then/else or some sort of loop structure. But asynchronous coding is something significantly different. You make a request to a Web server and within that request, you send it the code that you want to execute when it finishes the job. That seems simple enough. I figured it would call the code when it was ready and then move on to the next step. But it doesn’t work that way. You move on to the next step immediately after making the request and you have no idea when it’s going to complete that request and invoke your callback function. I would make a request from the server for a piece of information. My callback function would tell the server where to put that information in my program. Then I would try to display that information on the webpage. But it was never there. When I would insert debugging code to see why it wasn’t there, it was there. It reminded me of the paranoid poem about the little man on the stair.
“Last night I saw on the stair
The little man who wasn’t there.
He wasn’t there again today.
Oh how I wish he’d go away.”
I was being haunted by the returned data that wasn’t there 🙂
What I didn’t understand was that this callback function wasn’t a normal subroutine where you call it, it executes, and when it returns you carry on. You have to carry on immediately after the request and you don’t know how long it’s going to take for the Web server to return your data. So you have to put something in the callback function that tells your main program “Hey he finally got what you asked for. You can use it now. It’s really here.”
When you are collecting several pieces of data in a row and you don’t want to proceed until you’ve got them all, the nested callback functions can get pretty hairy. It took me a long time to figure out what I was doing wrong. It also took a lot of patience on the part of the people from Pinoccio in their support forums to walk me through my inadequacies is particular area of programming. I owe them a tremendous debt of thanks. (Humorous note here… When I dictated the previous sentence using my dictation software, it misunderstood me and said “I/O them…”. How appropriate for a “.io” system). Anyway they were most gracious and patient with me.
I did my best to pay back their kindness. I blogged everything I could about the device. I showed it off on the Adafruit Google+ Hangout Show-and-Tell. I blogged about how to get around some SSL certificate problems that cropped up along the way. And I did my best to educate them in the hardware requirements necessary to make an infrared backpack for the Pinoccio system. And ultimately I did get a working Internet-of-Things infrared remote that I used to operate my TV and cable box.
My cable box is located in the living room but I have an HDMI cable that runs into my adjacent office so that I can watch the same thing my dad is watching and living room. I can get on a webpage in the office and control the cable box in the living room. I used it every day for several months and it was a real godsend. I succeeded in replacing my defunct and unsupported RedEye remote.
I included Pinoccio support in my next public release of my infrared library IRLib. I began cleaning up my asynchronous webpage code and preparing to publish it to share with the world everything I have learned so that the next novice who came along would have a clear and simple tutorial to follow I would not have to bother the people in the support forum to learn the things I have learned the hard way.
One of the things that bothered me about the entire system was that it was totally dependent upon the website hq.pinocc.io servers were maintained by the Pinoccio organization. On occasion, their server would crash and I would be stuck with a useless system. I asked them what do we do to remove that dependence. The old RedEye remote system was accessed directly to the local IP address of the device itself. It also included its own Web server in the device. In contrast the Pinoccio system required me to make my own webpage to control the device (as great as HQ was it wasn’t sufficient). That meant I had to install a Web server on my PC. I can only control the system from that PC unless I uploaded the webpage to cyborg5.com which I didn’t want to do. Setting up WampServer on my PC was much easier than I anticipated. That allowed me to host my controlling webpage with no problem.
Furthermore my webpage could not communicate with the device directly. It had to go through their servers. My controlling webpage went to a URL on their server and their server connected back to the device itself. The whole point of Pinoccio, for me at least, was to replace the defunct out of business RedEye Remote. What was I going to do if Pinoccio ever folded? They assured me that they were working on a system that would allow direct connections without going through their server system. And in the end they did so.. They developed a system where you could plug one Scout into a PC and have it communicate directly with the other Scouts using the mesh radio. You didn’t need the Wi-Fi at all. They called it a “Bridge Scout”. While that was of suited my purpose, still wouldn’t have given me all of the capabilities the device should have had. There supposedly is a way to set up one’s own server that would duplicate their part of the infrastructure. I believe them when they tell me that. However doing that myself would required another steep learning curve that I didn’t really feel like attempting. It would require more than I can get out of WampServer. It involved node.JS and a variety of other things that were beyond me.
Unfortunately somewhere along the way the device got a bit glitchy. There were constant software updates some of which I kept up with and some I did not. After not doing updates for several months, I finally decided to do an update in hopes of fixing the glitches. The end result was my device quit working altogether. I spent a couple of weeks presuming that the problem was an adverse interaction between my infrared code and their systems software. It involved going onto GitHub and figuring out which version of the software I had been using that was working somewhat well and then individually applying each and every update that had occurred over the period of several months. I finally found the patch that was causing my code to crash. In the end it was not an adverse reaction between my infrared code and their system. I was able to whittle it down to an example that did not include my IR code at all.
Somewhere in the midst of all this, I ended up “bricking” my lead scout. Somehow during a crash, the boot loader was overwritten. They talked me through a system wherein you could use one Scout as an ISP to restore the boot loader on a broken Scout. Initially that process did not work because I tried to do it with the Wi-Fi backpack still installed. Somewhere along the way while adding and removing the Wi-Fi backpack without disconnecting the power, I permanently damaged the Wi-Fi backpack. That meant that the so-called “Ecosystem for the Internet of Things” was no longer Internet capable. A replacement Wi-Fi backpack would cost $79. I was able to get the system running somewhat using the bridge Scout they described where you had to keep one unit plugged into a PC to communicate with another unit. However I had become frustrated with the whole thing and needed to get away from it for a while.
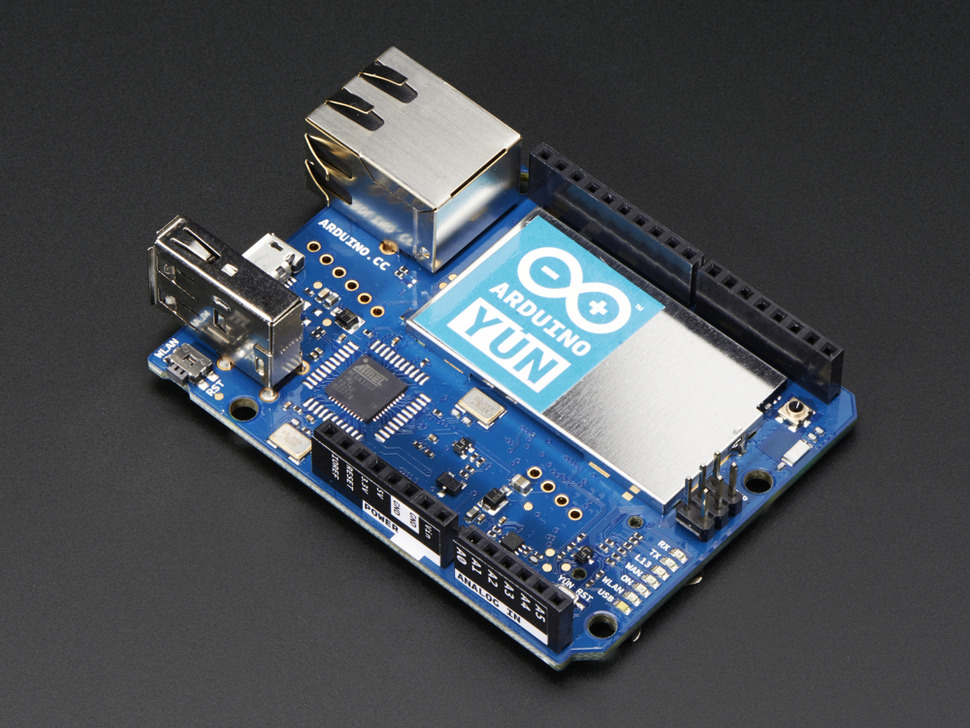 I ended up ordering an Arduino Yun from Adafruit.com. I immediately fell in love with the device. It consists of a powerful microprocessor running a minimal version of Linux and an Arduino Leonardo in one device. The communication between the Leonardo and the Linux was well defined and easy to use. The Linux portion did include its own Web server. You could also update the onboard Arduino sketch and the associated webpage using the latest Arduino IDE and do so wirelessly for Wi-Fi. That ability to update wirelessly was something that Pinoccio had promised from the beginning but never did fully implement at least from a users perspective. They did allow you to update system software wirelessly but not user programs at the Arduino level.
Although I did have the Pinoccio experience under my belt along with the experience of doing asynchronous callbacks to Web servers, setting up my IR remote on the Arduino Yun took me only a day and a half rather than the weeks and weeks of frustration that I had with Pinoccio. One of the things that was probably the nail in the coffin of Pinoccio for me personally was the fact that I could buy an Arduino Yun with its embedded Linux, Wi-Fi, Arduino Leonardo, and built-in Web server with no external infrastructure needed for about $75. That was four dollars less than the Wi-Fi backpack alone for Pinoccio.
With the success of modules like the CC3000, Particle a.k.a. Spark Core, and the amazing new and inexpensive ESP8266 there was no hope for Pinoccio. They might have salvaged it by ditching their own Wi-Fi backpack and making a backpack using the ESP8266.
My intent had been to take a break from Pinoccio after I got the other system up and running. I still felt like I owed them those tutorial blogs to help other Pinoccio users not have to go through the blood sweat and tears that I’ve been through. But I got distracted with other projects and never was able to do it. Now of course there is no more Pinoccio. Their servers are shutting down at the end of the month and anyone who hasn’t figured out how to launch their own server or who is content with using bridge mode is going to be out of luck.
Ironically my old RedEye Remote has in some ways outlasted the Pinoccio. Even ThinkFlood shut down over two years ago, you could still use their device as long as you didn’t need to update the software. I’ve been using mine as an Internet remote to control my bedroom TV and cable box in the same way I’m using the Arduino Yun for the living room. However I recently purchased a new TV in the bedroom and I cannot update the RedEye with the new codes. I had to order another Arduino Yun.
I had a bit of a scare because the Yun has been out of stock at Adafruit for a couple of months now. Fortunately I found one at my second favorite supplier SparkFun.com. I’m pretty sure that the shortage is a consequence of the trademark disputes between Arduino.cc and their previous hardware manufacturing company which has now rebranded itself as Arduino.org. Is my belief that Arduino.cc should and will win the dispute. And I’m absolutely ecstatic over the new announcement that Adafruit will become the US manufacturer for Arduino.cc. I’m confident that both Arduino and Adafruit will be around for a very long time.
In the end I think I’m going to miss Pinoccio. I was quite fond of the little fellow and a bit disappointed he never really achieved his full potential. I don’t regret any of it however. I learned a lot of useful programming. And I learned some lessons about crowd source funding. And it serves as a cautionary tale about Internet of Things systems that are too closely linked to their infrastructure. I think that as IoT continues to grow that’s going to be an important lesson for everyone.